How to add, remove, and control timeline tracks
Learn to add, remove, lock, disable, and isolate tracks on the timeline.
By default the elevate.io timeline starts with 4 tracks for both video and audio. You can control the quantity and behavior of timeline tracks in various ways.
Add or remove a track
Add a track by right-clicking on any track on the far left of the timeline and select
Add Track.Remove a track by right-clicking on the track you want to remove and selecting
Delete Track.
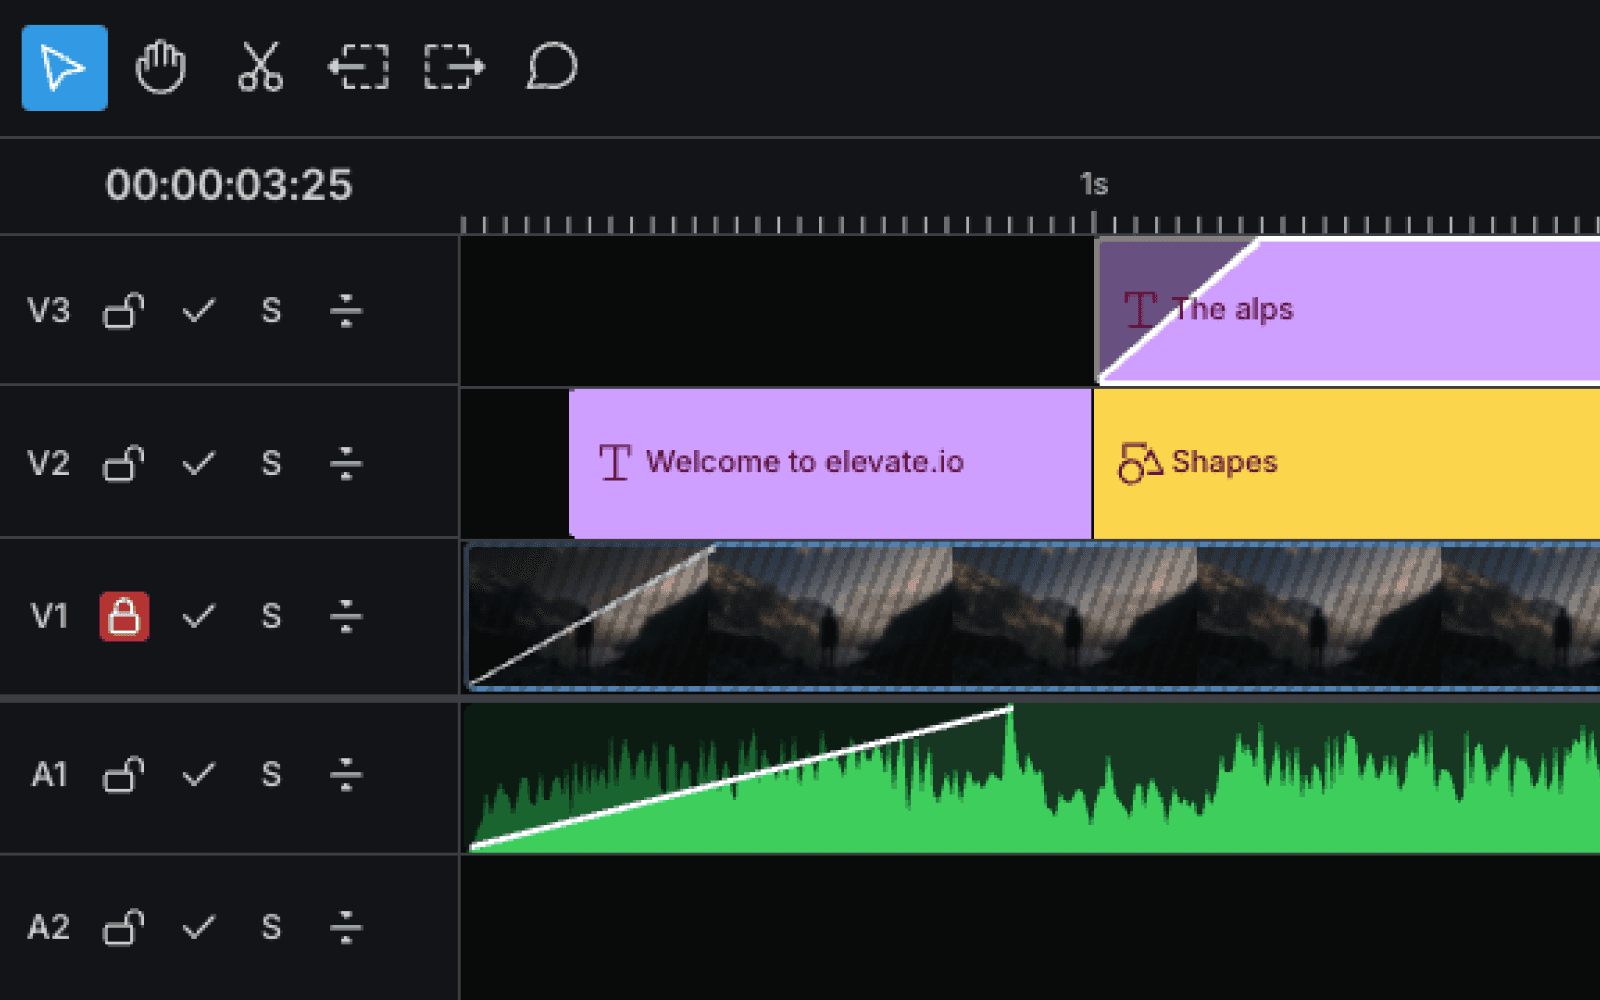
Lock a track
To prevent any accidental changes to a track lock it by clicking the open padlock icon to the left of the track. The icon will turn red with a closed padlock to indicate that the track has been locked.
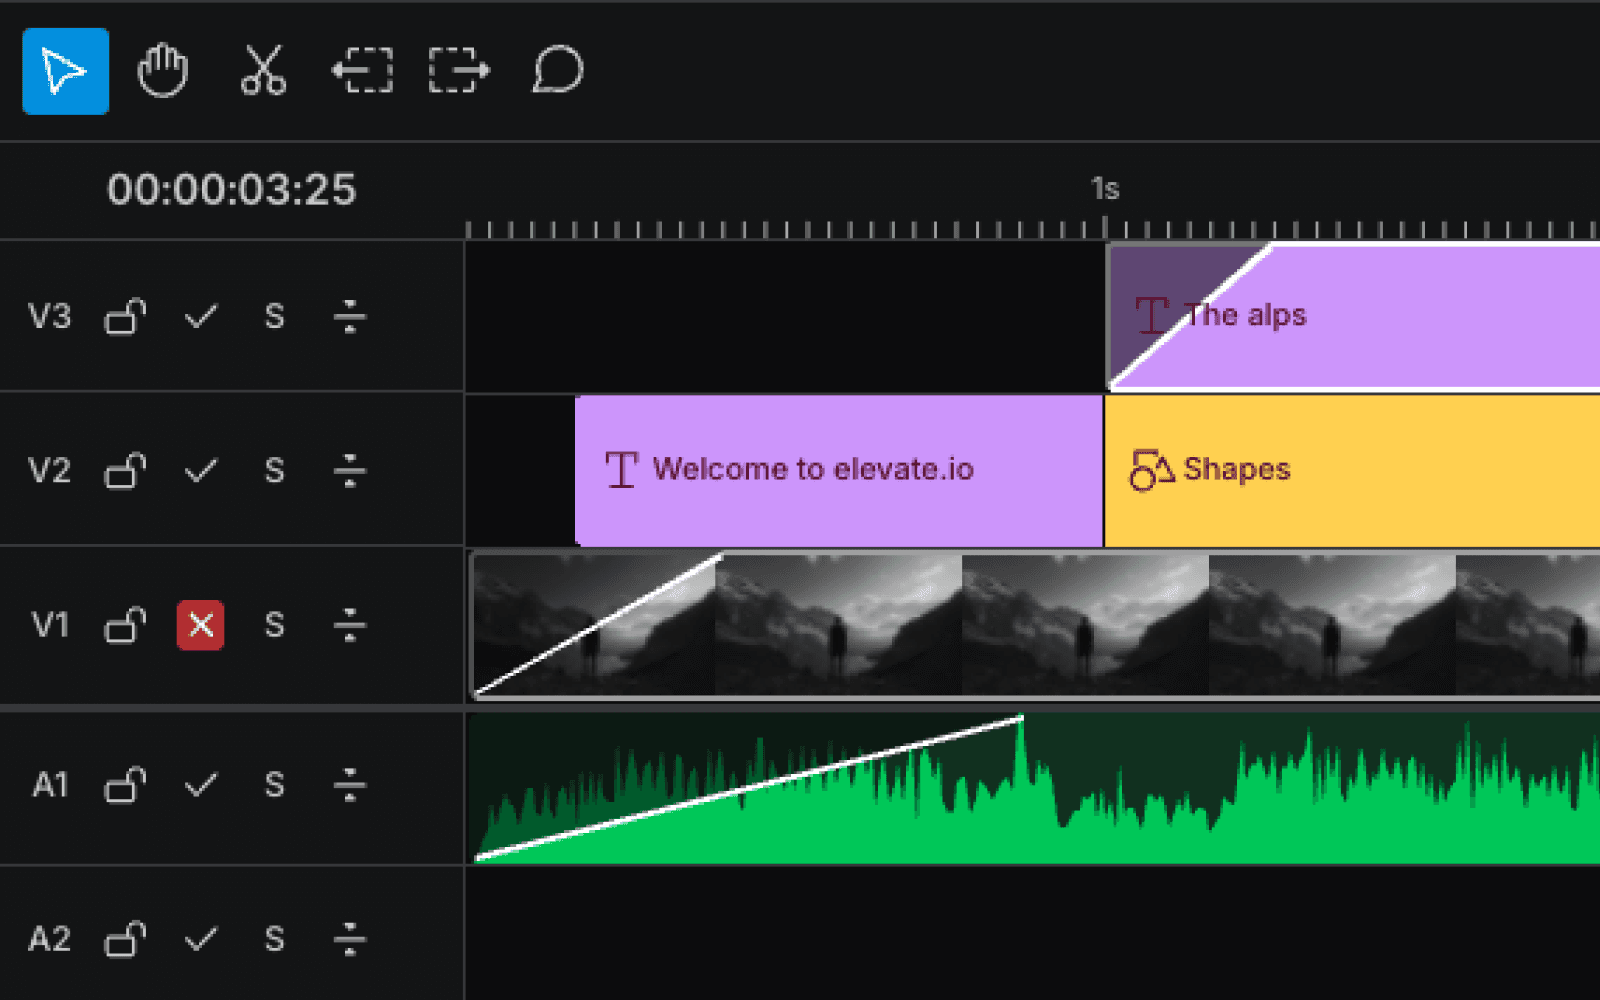
Disable a track
You can disable a timeline track to exclude it from your video without deleting it. Click the check mark icon to the left of a track to disable it. The checkmark will turn into an x with a red background to indicate that it has been disabled.
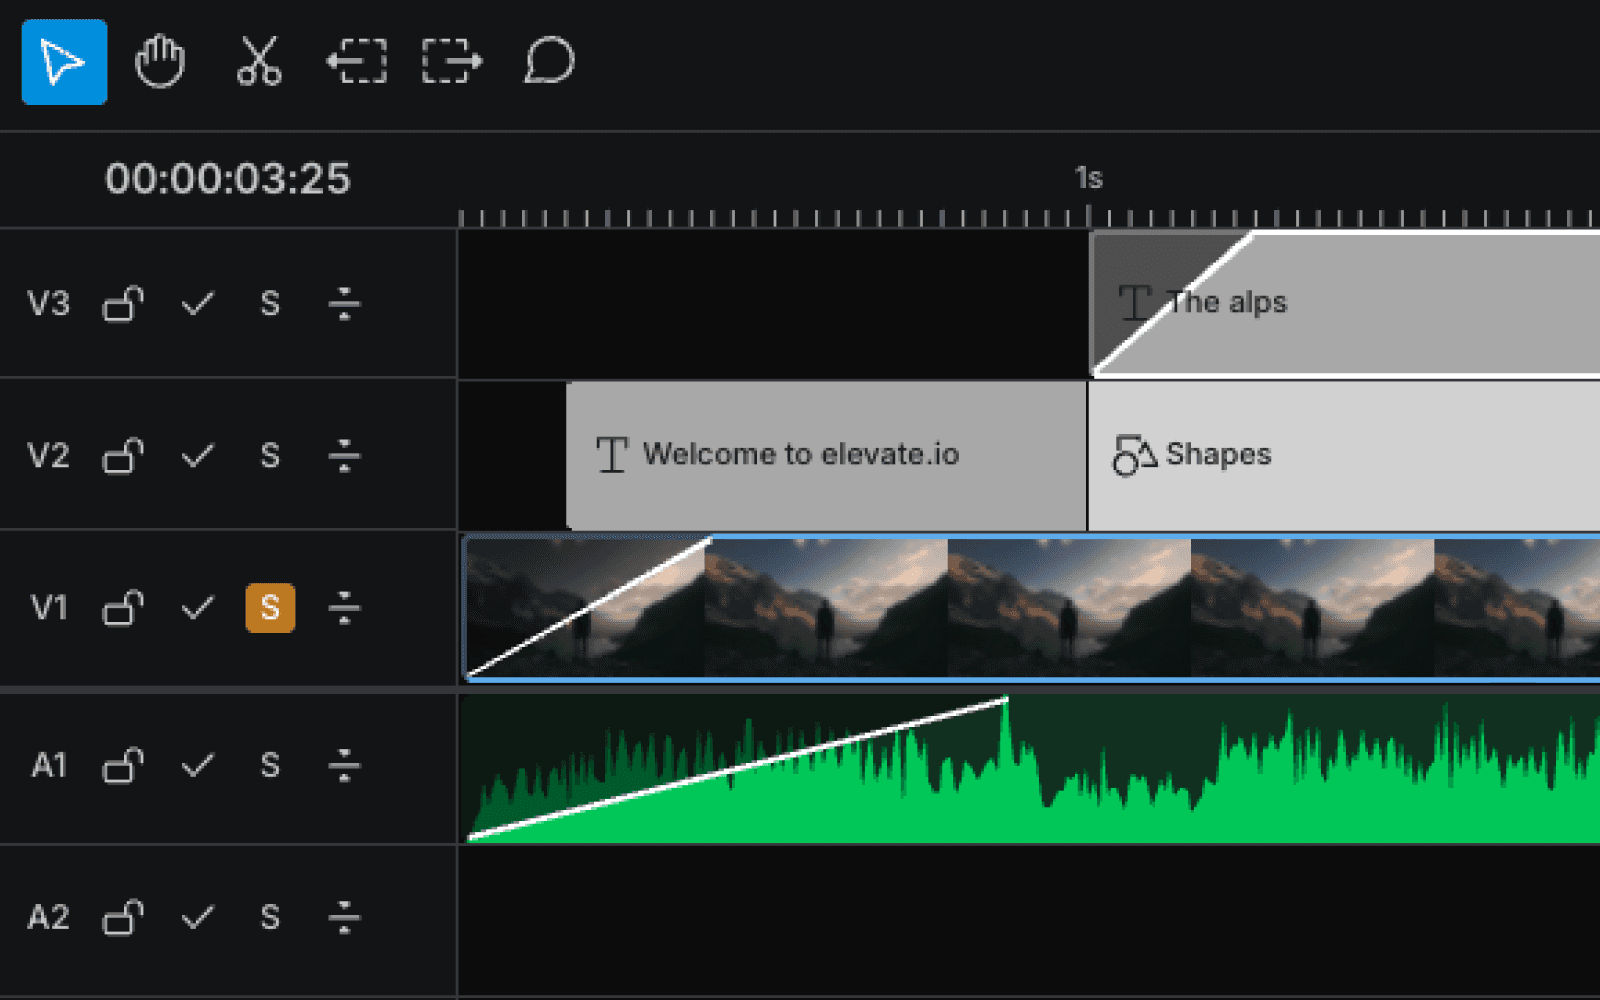
Solo a track
If you want to preview a specific track without including any other tracks, slick the S icon to the left of a track to toggle solo mode. The icon will turn amber to indicate that solo mode has been activated. You can toggle solo mode on multiple tracks — including all solo mode tracks while excluding those not on solo mode.