How to edit a video online in elevate.io
Learn the basics of video editing with elevate.io, the online video editor that runs in the browser.
Welcome to elevate.io, the collaborative online video editor for solo creators and teams. This guide will walk you through getting started, from signing up to exporting your first video.
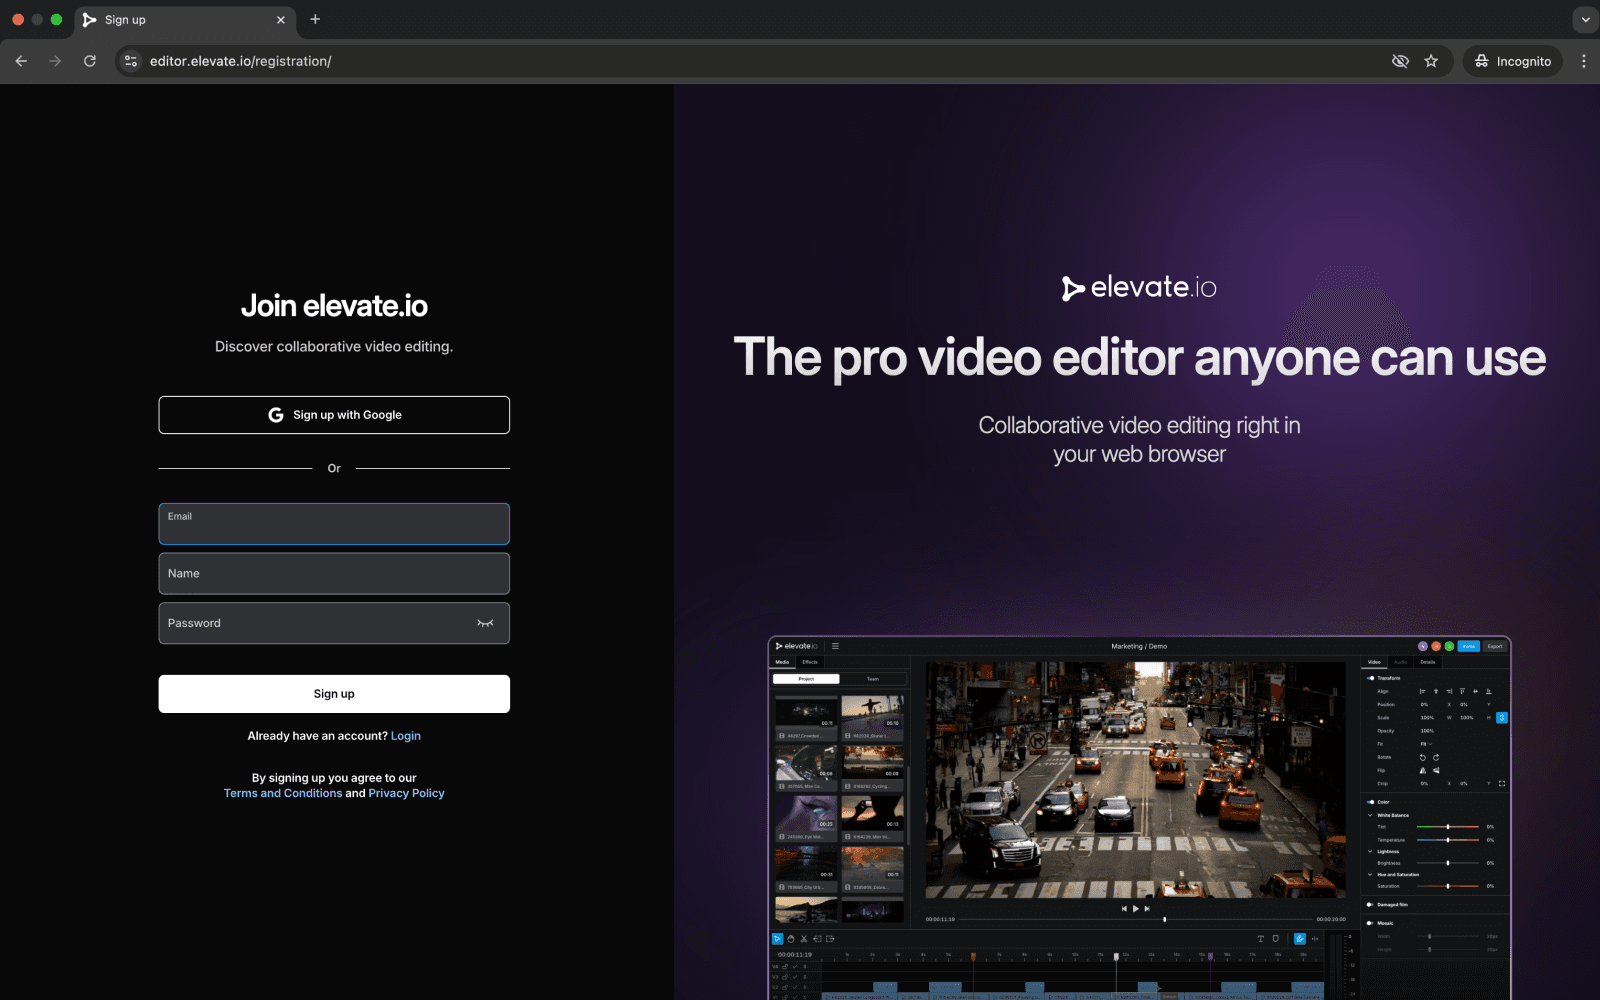
Sign up
Sign up for a free account by clicking
Sign upin the top right.Enter your email, name, and password, or sign in with Google.
Check your email for a verification code, then paste it into the verification box back on the website.
Onboarding
Answer a few quick questions to personalize your experience.
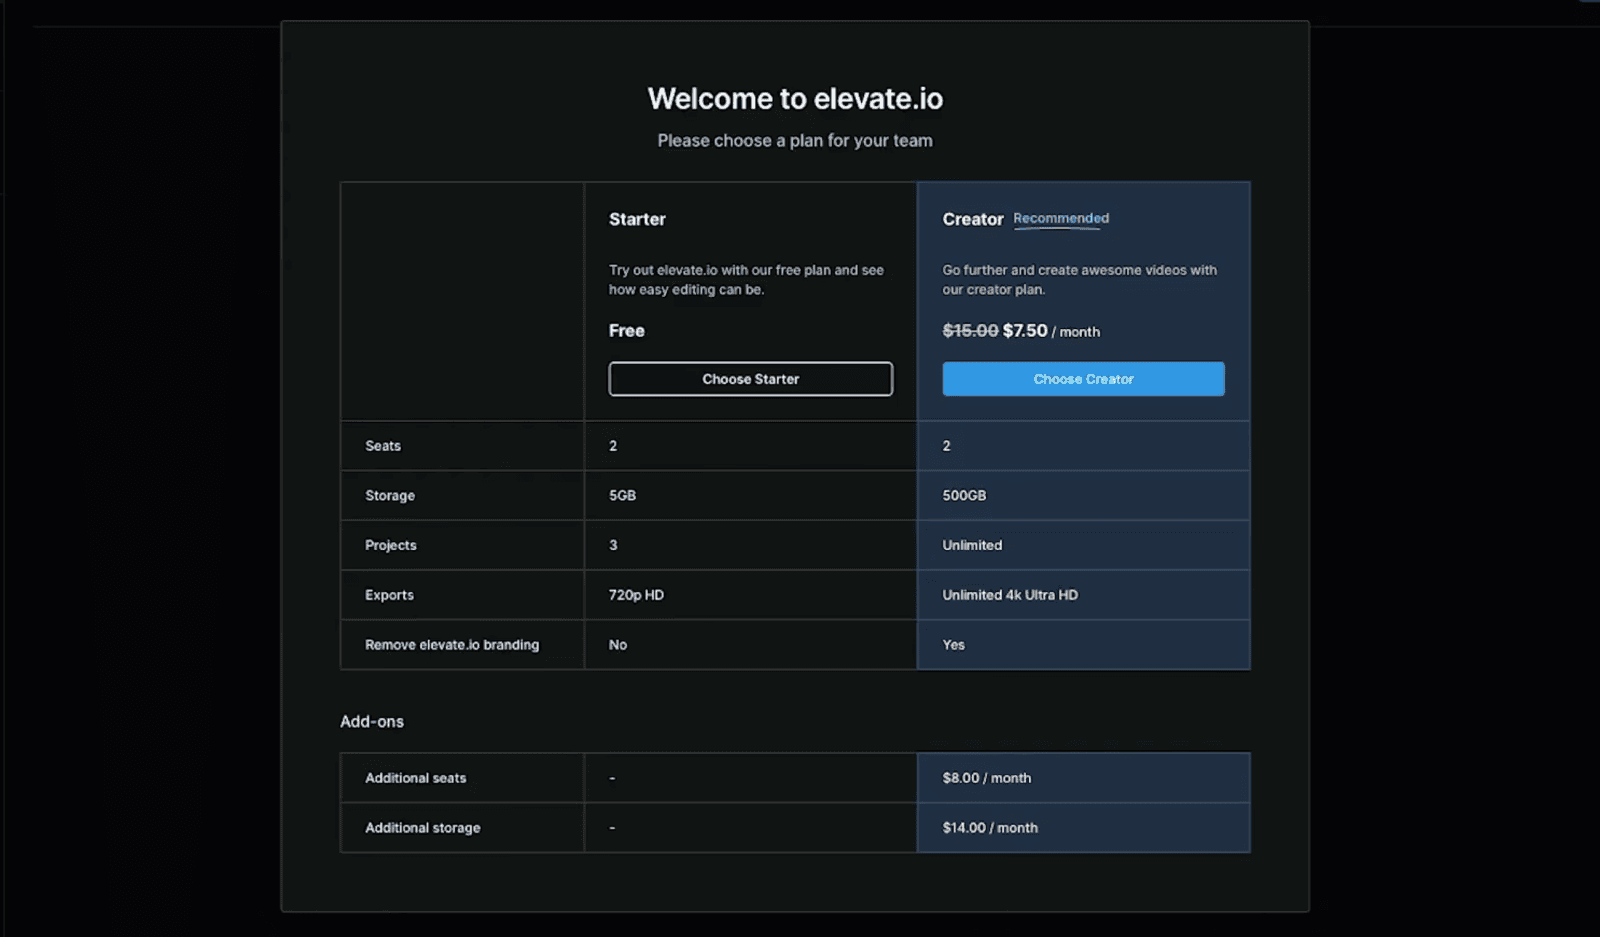
Choose a plan:
Starter plan: A generous free plan ideal for getting started.
Creator plan: The ultimate online video workspace with 500GB cloud storage, unlimited 4K Ultra HD exports, and more.
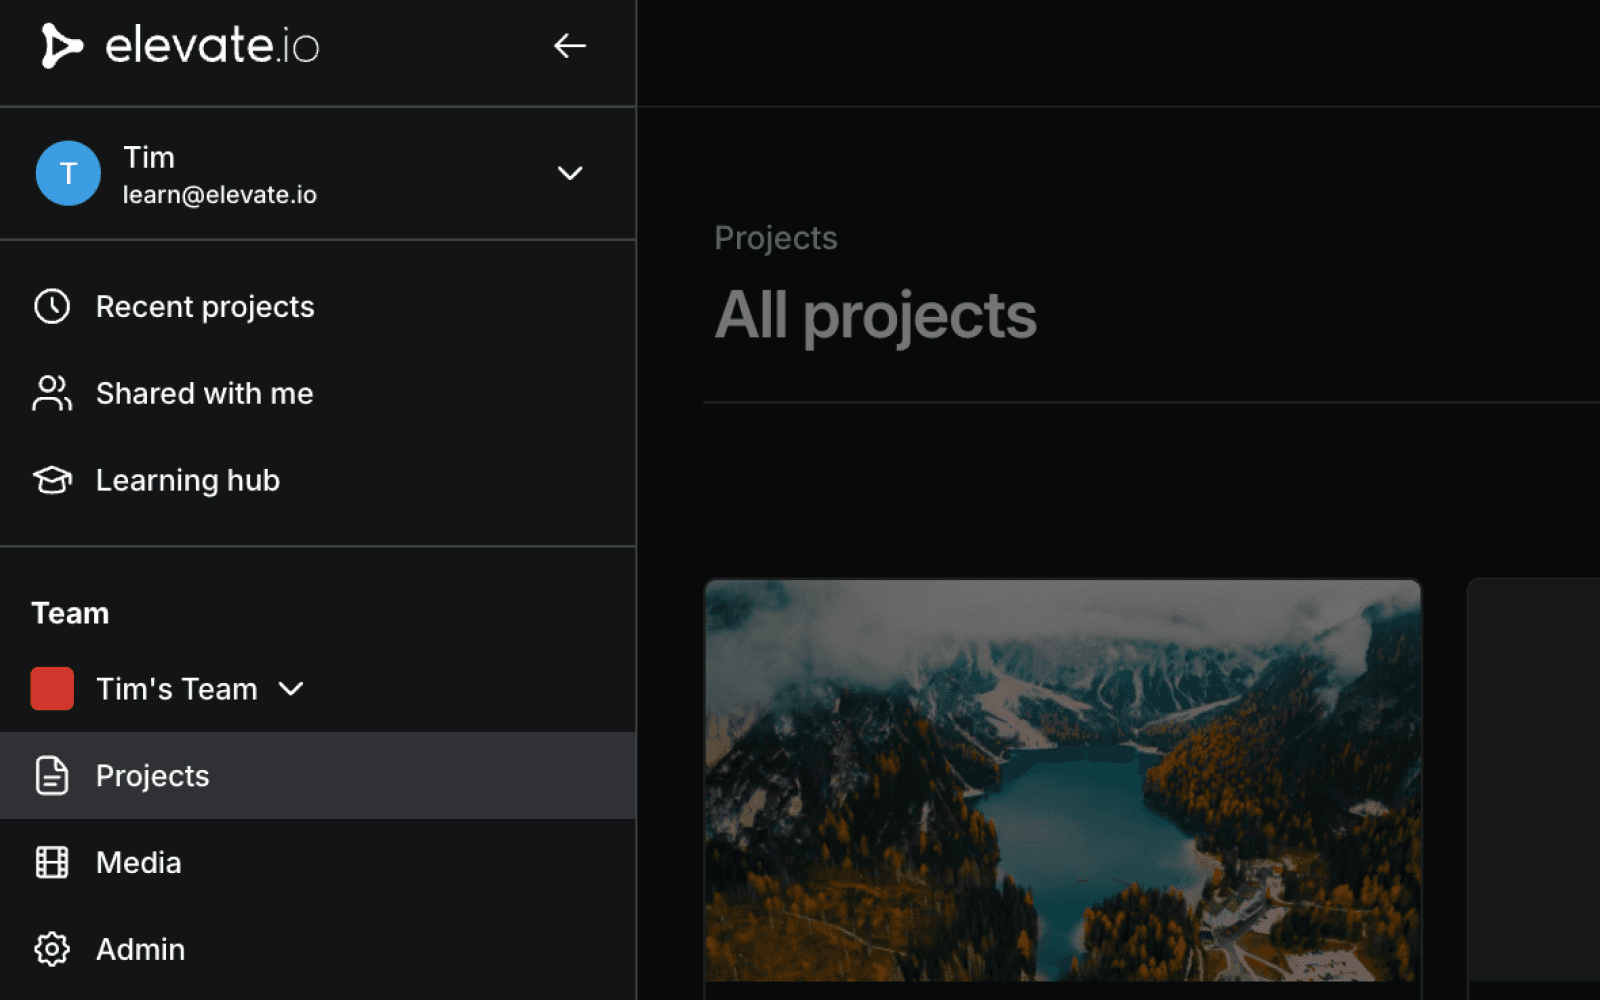
Enter the elevate.io workspace
After signing in, you’ll land in your online video workspace, your central hub for:
Projects
Media
Learn Hub
Settings
Start a new project
Click the blue
+ Create projectbutton in the top right corner of your workspace.Once you're in, name your project by clicking and changing ‘untitled’ at the very top of the editor.
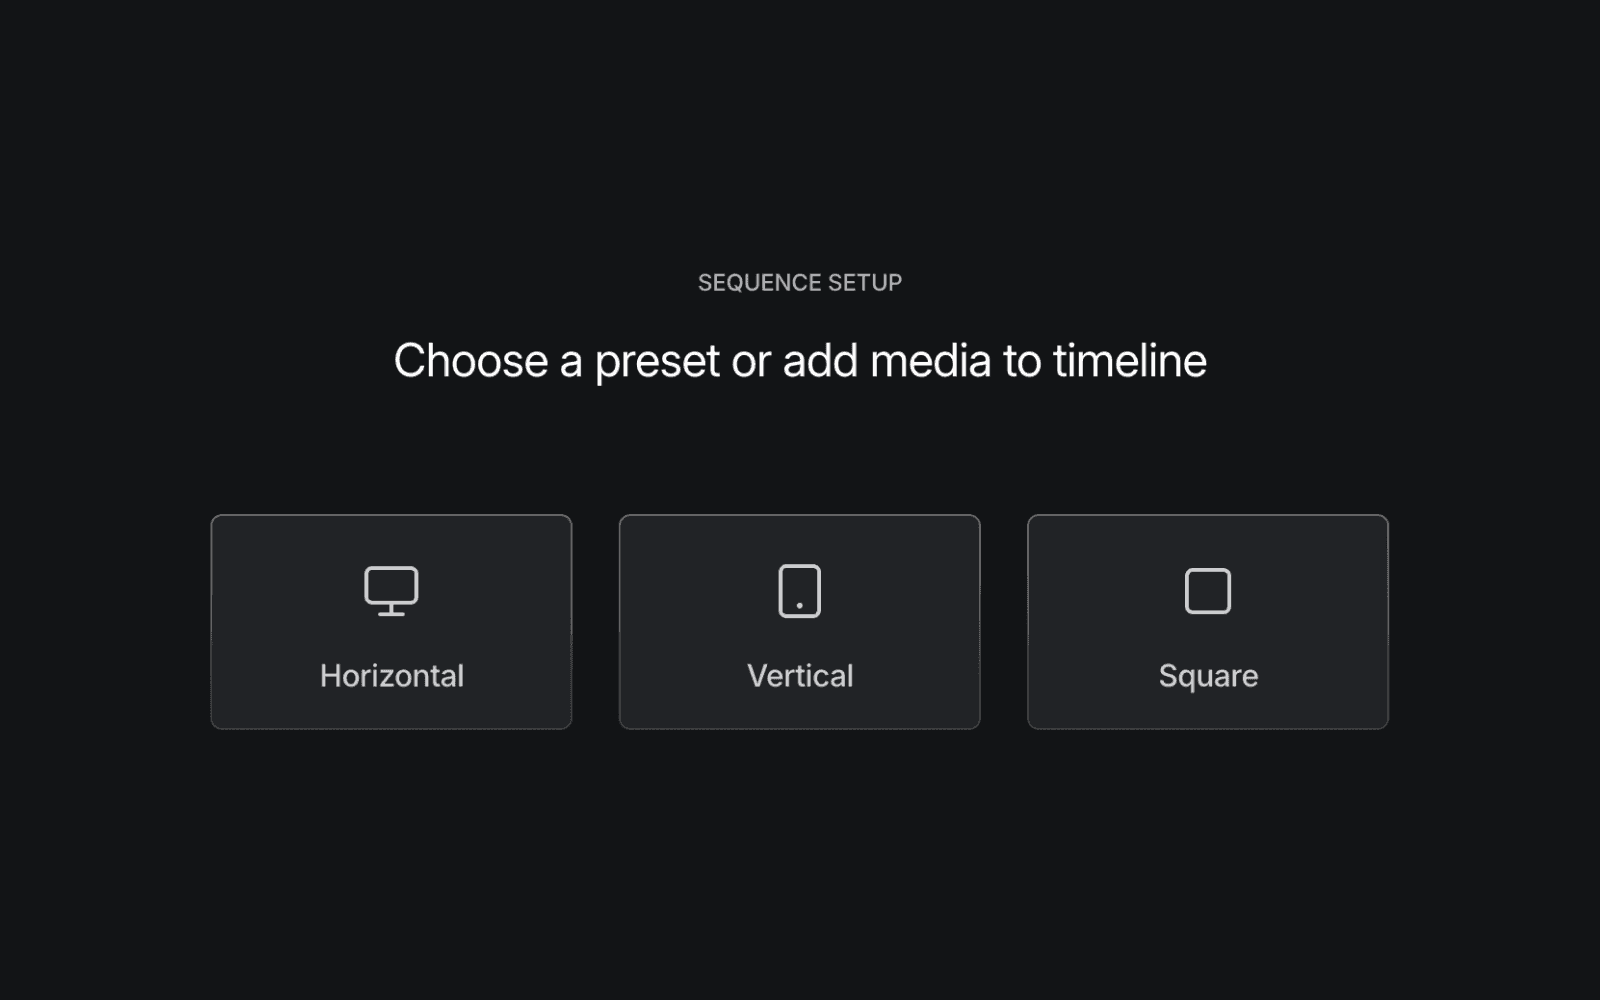
Select an aspect ratio
Horizontal: Ideal for YouTube or presentations
Vertical: Perfect for Instagram or TikTok
Square: General social media posts
If unsure, you can also upload your first piece of media and drag it onto the timeline. The editor will automatically match its aspect ratio.
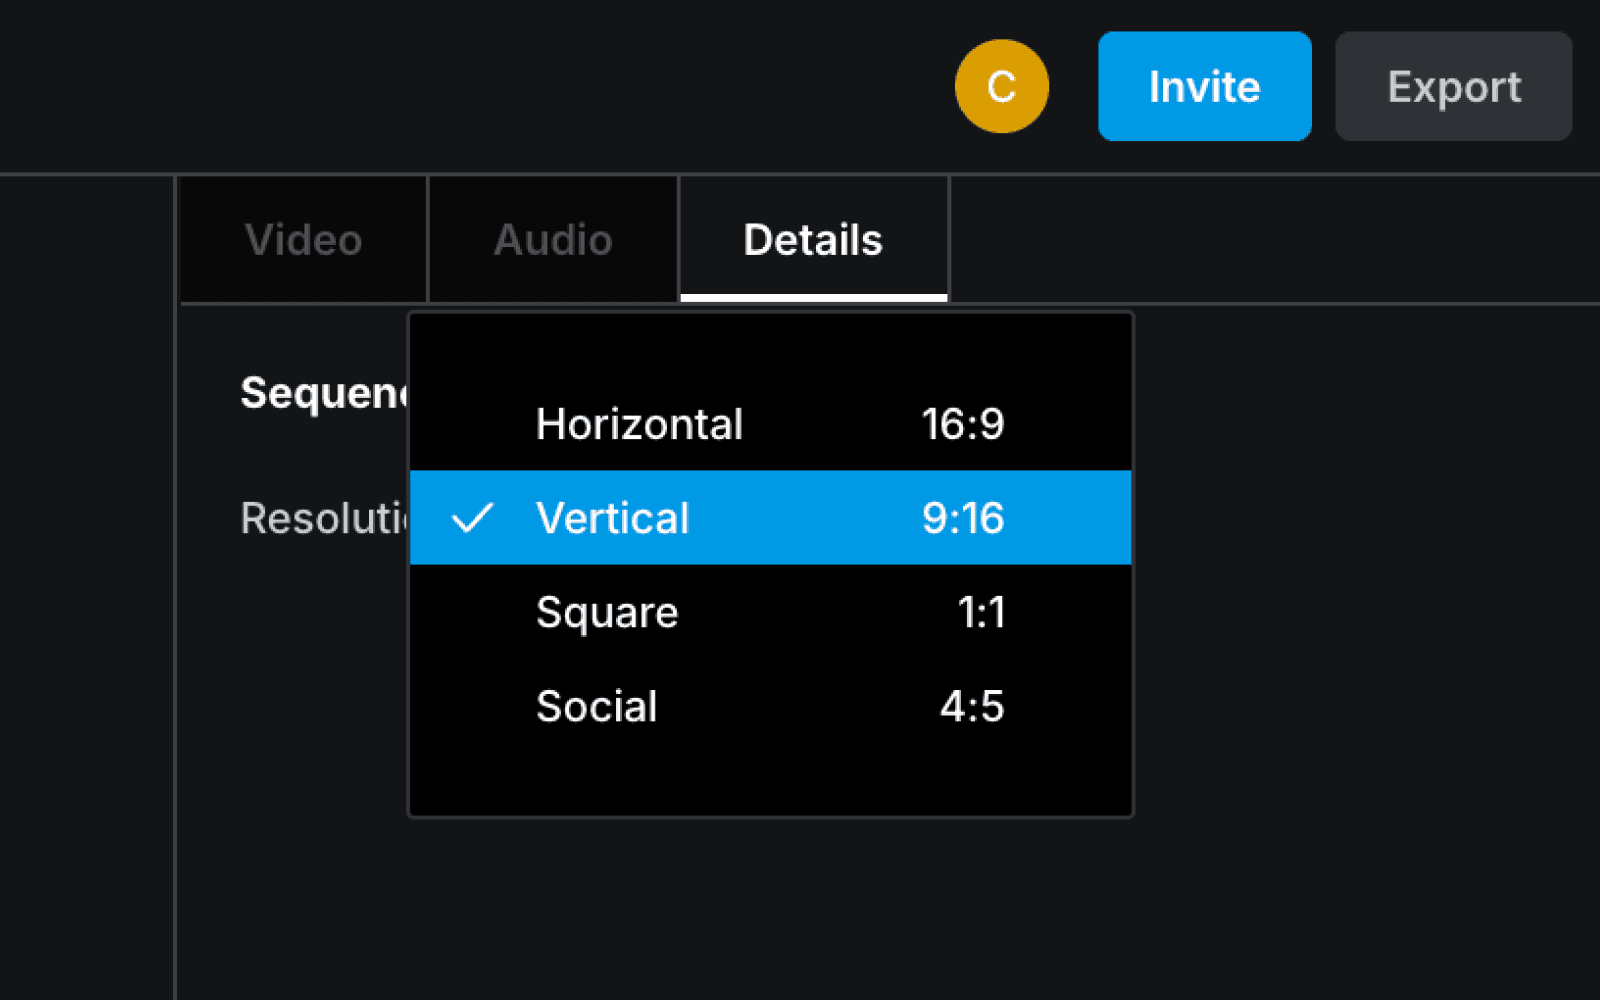
Change aspect ratio
Go to the Details panel on the right-hand side of the editor
Expand the Resolution dropdown to select a different aspect ratio. This is also where you can find the 4:5 option — great for social ads and carousels.
Upload media
To upload media, drag and drop the files from your computer into the Media panel on the left or click anywhere in the Media panel to open your computer's file browser and select files.
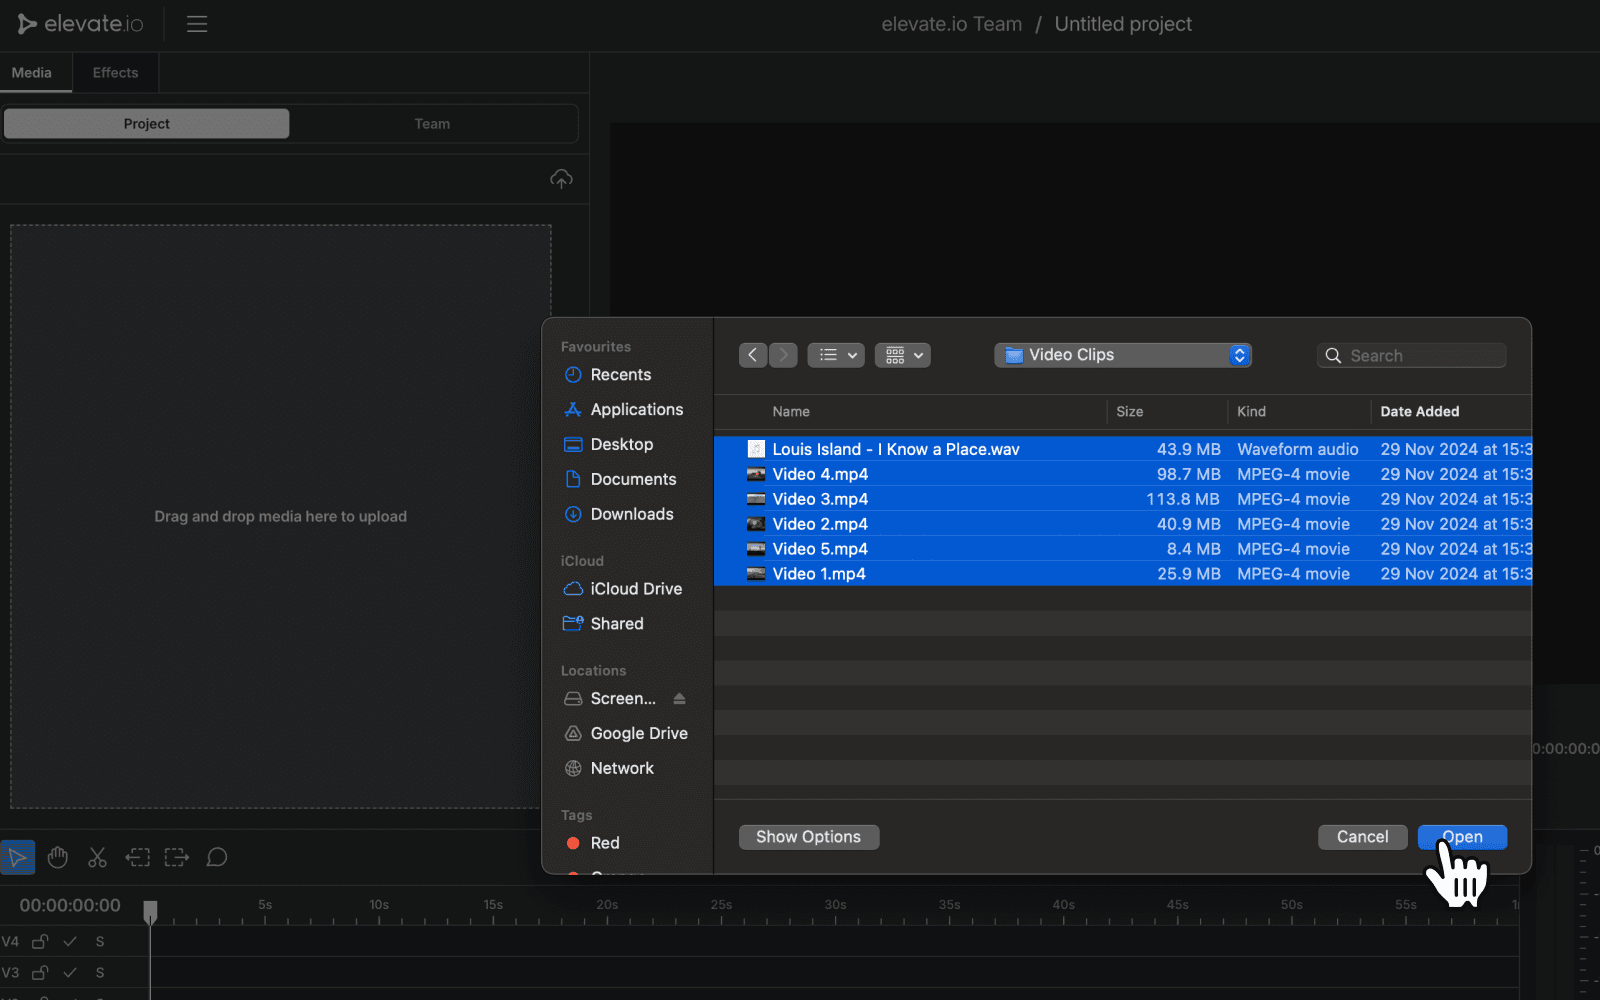
You’ll notice there are two sections within the Media panel:
Project: All the media associated with the current the project.
Team: All media that belongs to the current Team.
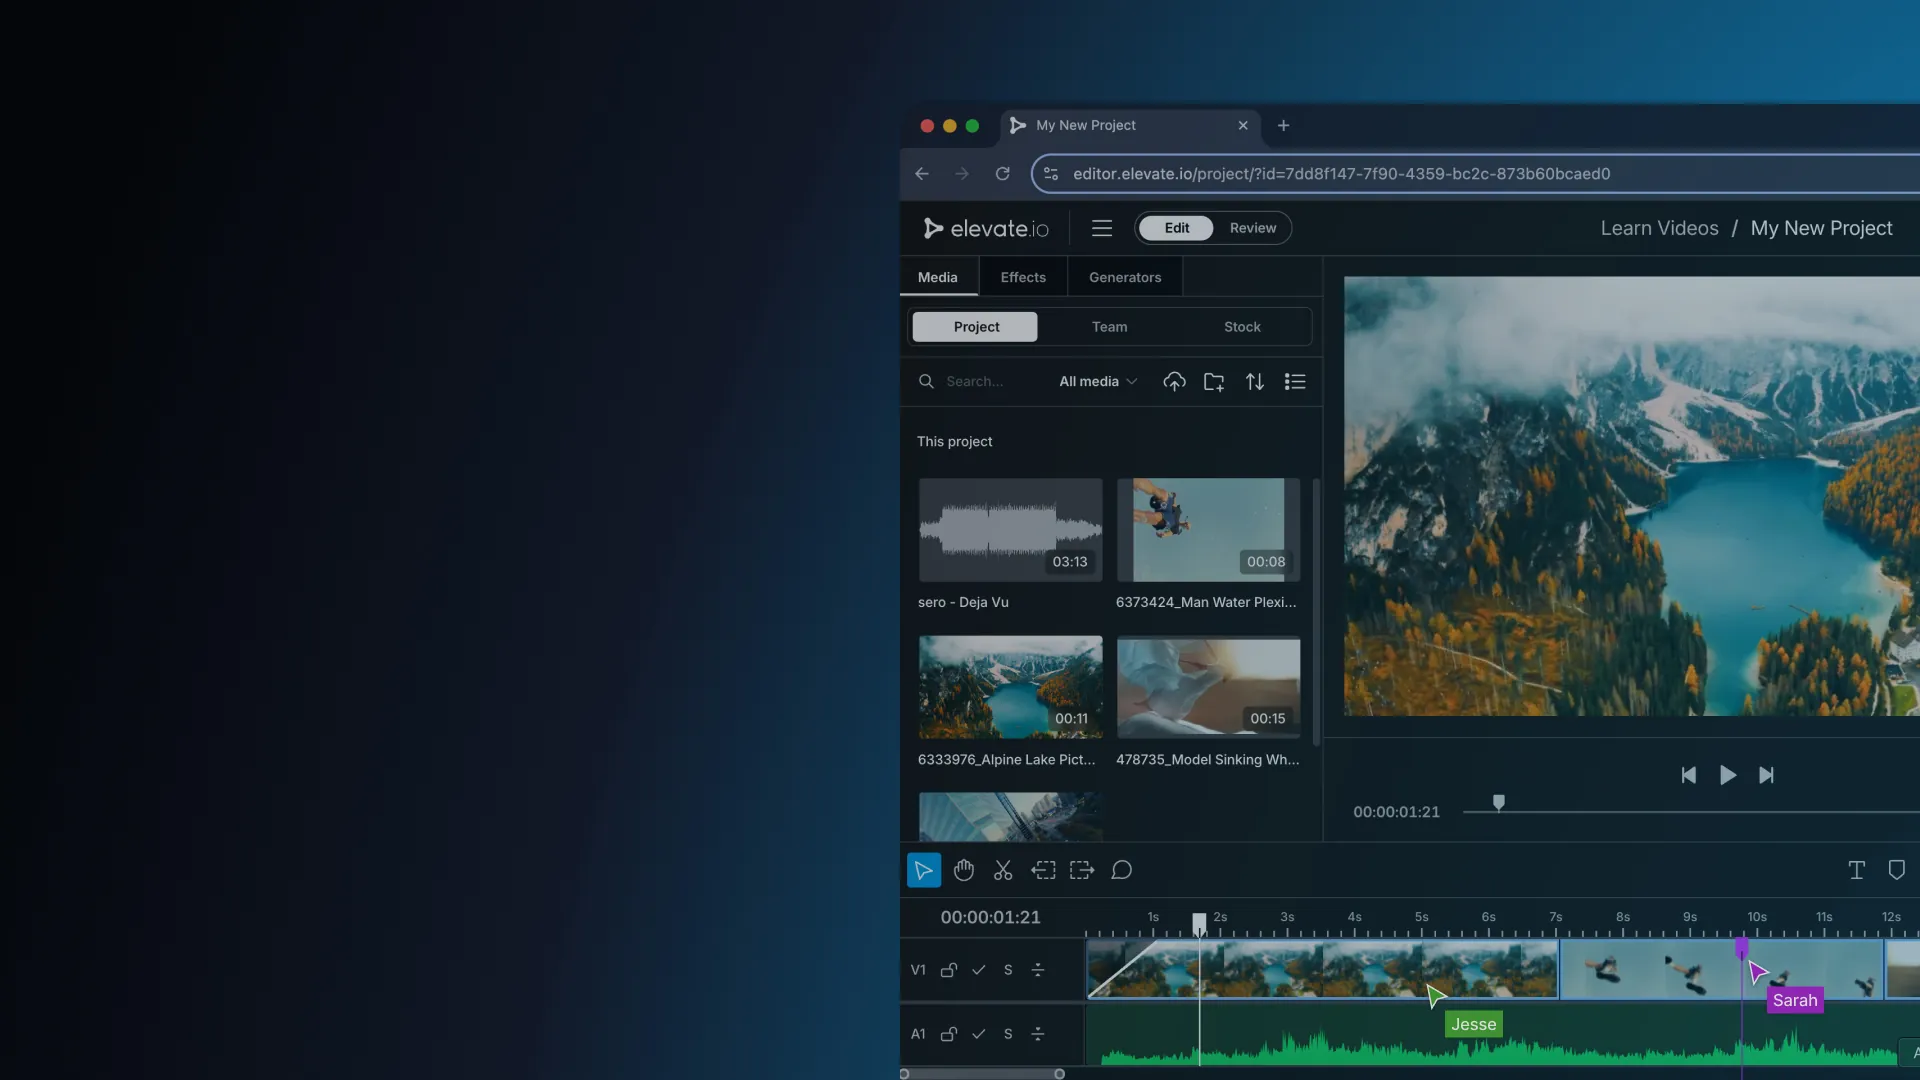
Edit your video
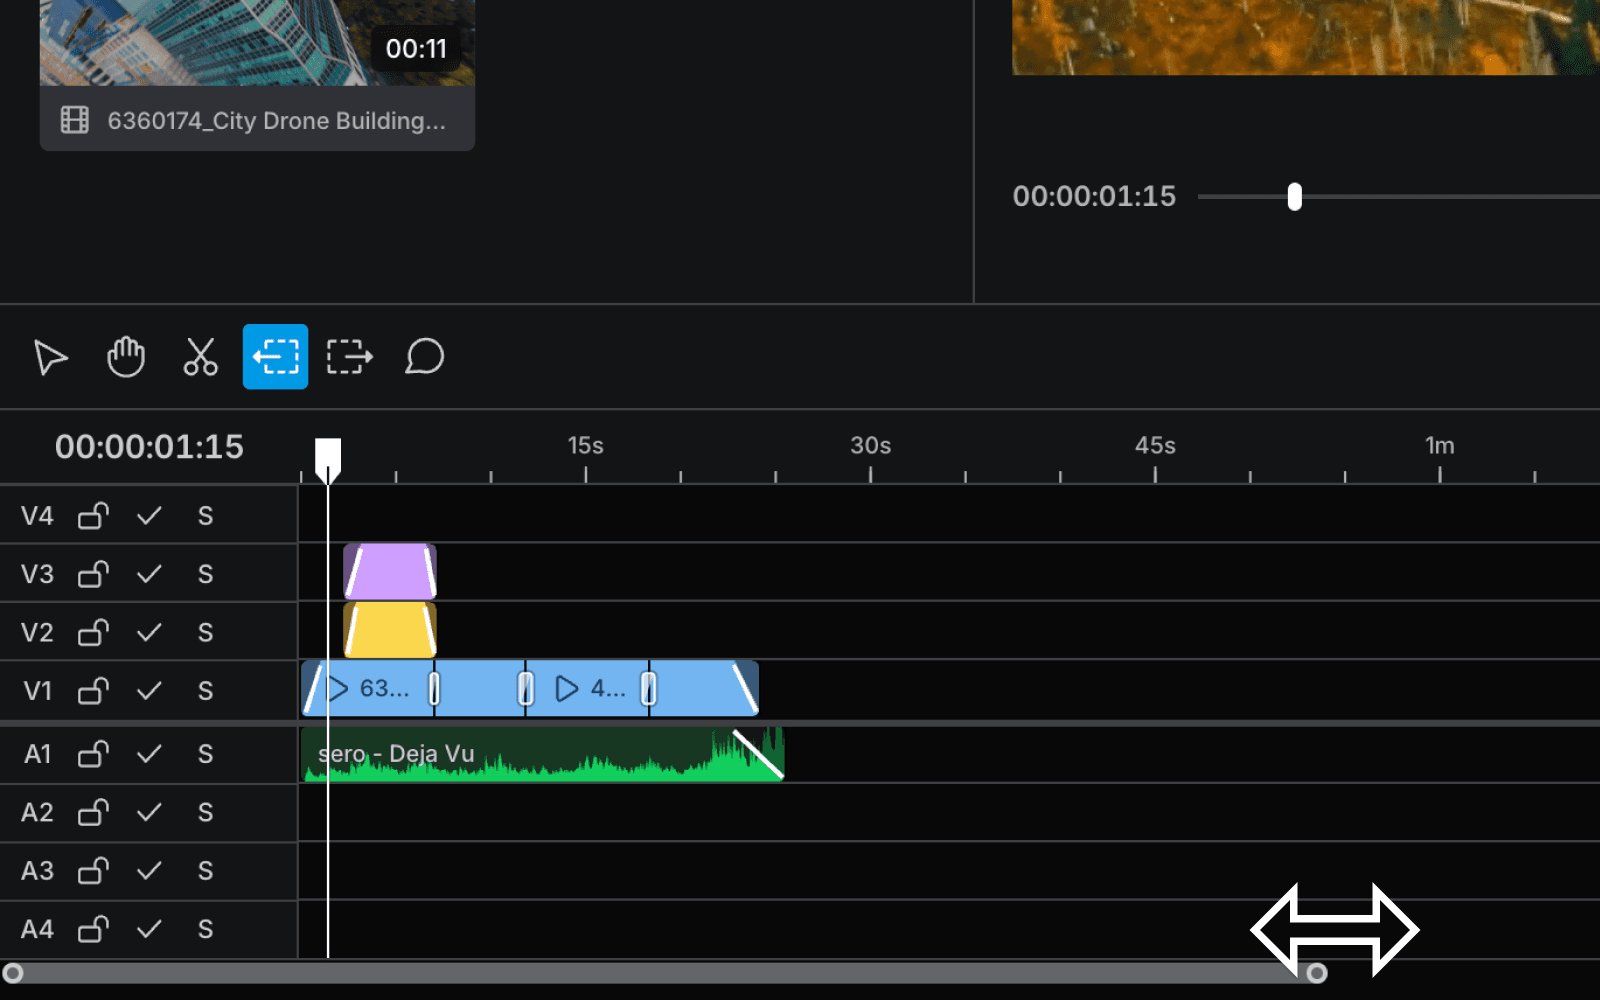
Add clips to the timeline
Once your media is uploaded, it’s time to start editing your video. Drag and drop footage from the Media panel onto the timeline. Then, use the Playhead to navigate your sequence.
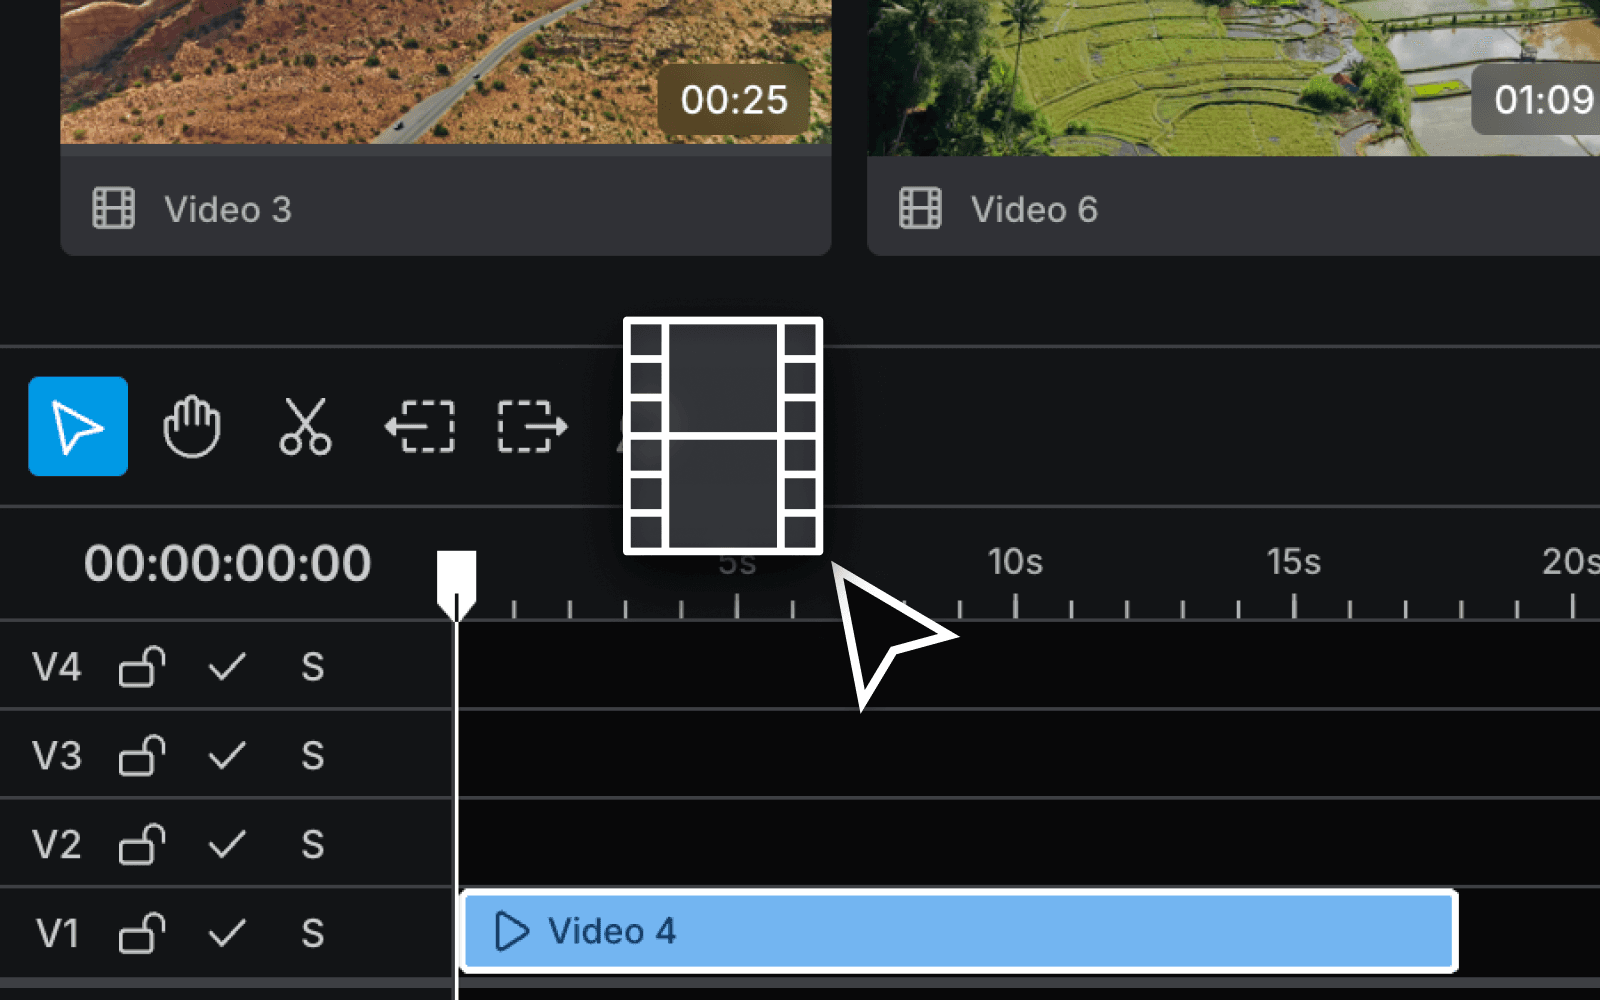
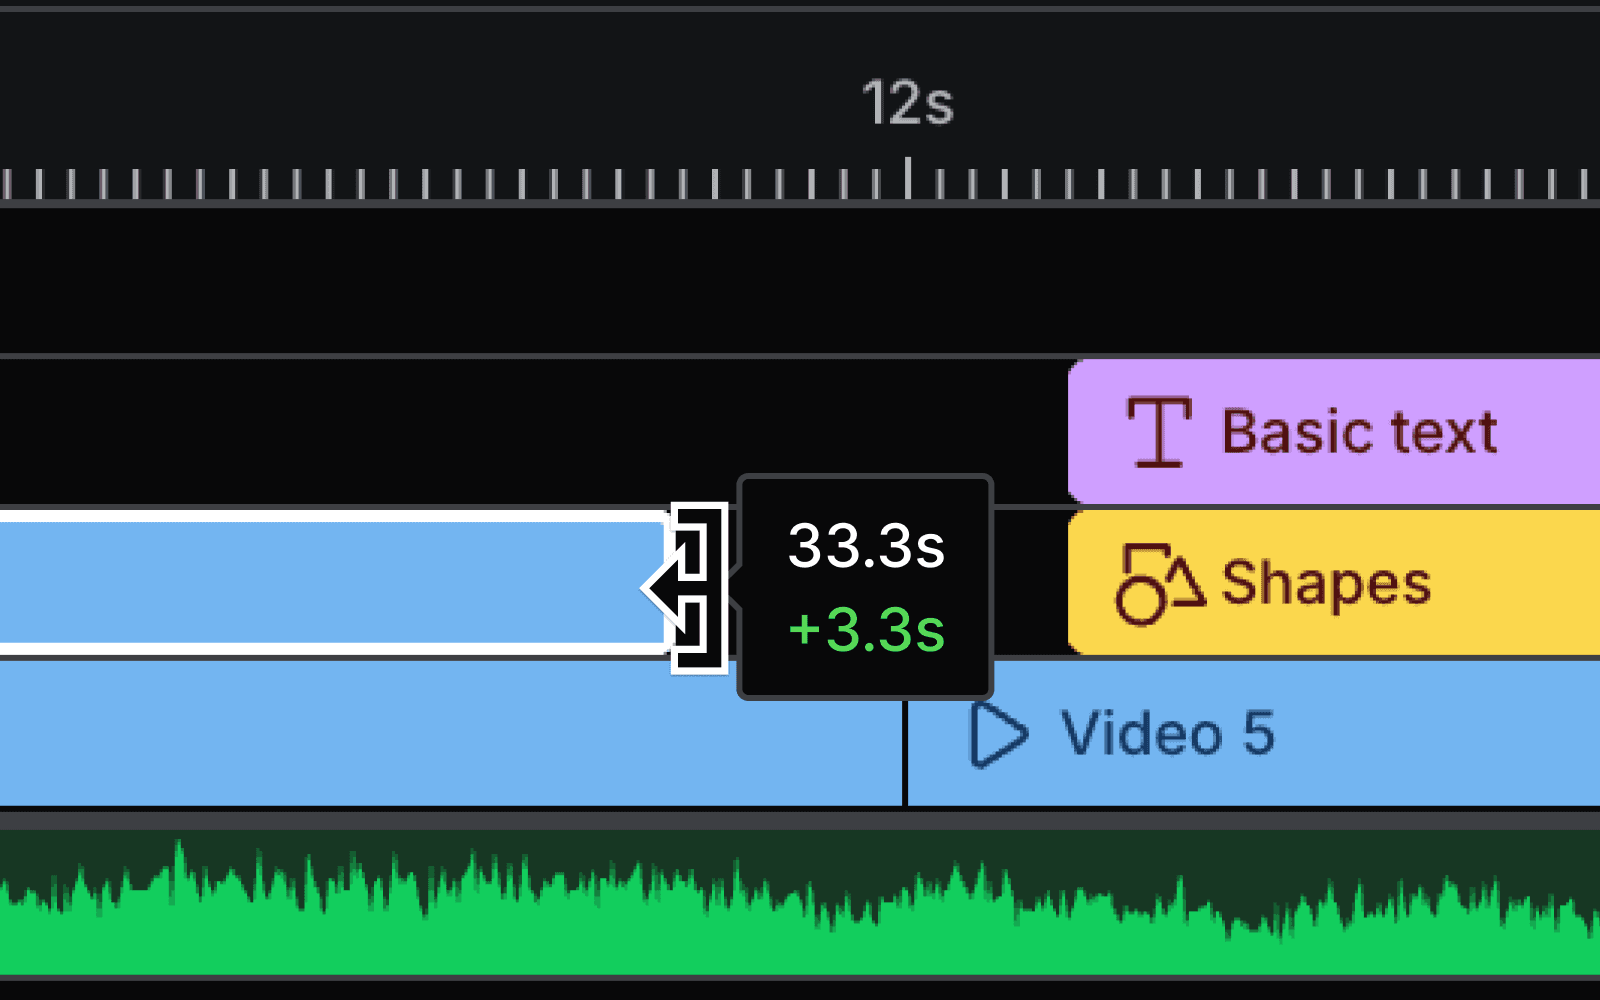
Trim clips
Drag the edges of a clip to trim its start or end. Move clips along the timeline to sequence your video using the editing tools on the left directly above the Timeline, such as the Pointer tool, Select backwards, and Select forwards.
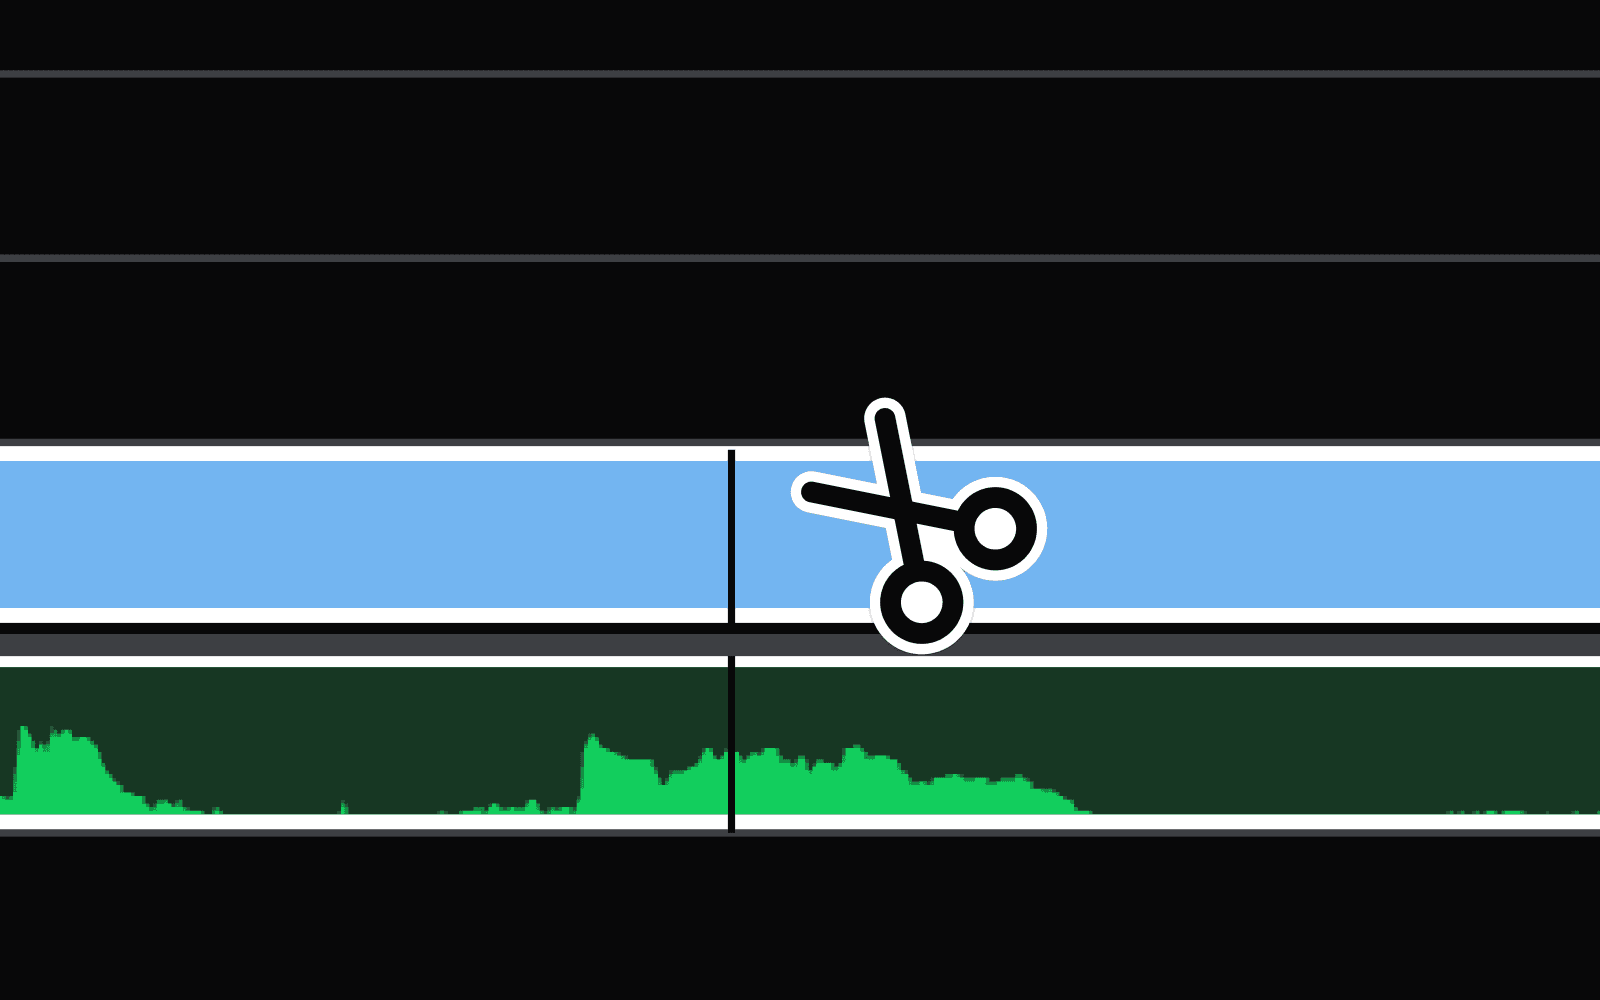
Cut clips
Select the Scissors tool directly above the timeline on the left and click anywhere on a clip to cut it.
Delete the section you no longer need by clicking on the residual clip and press the
backspacekey on your keyboard.
Zoom in and out of the timeline
To zoom in and out of the timeline, make sure your mouse is placed anywhere on the timeline.
On a trackpad: Pinch with two fingers.
With a mouse: Hold
controlandscrollthe mouse wheel.In the editor: Select, hold, and drag the edge of the horizontal scroll bar located at the bottom.
Fade in and out
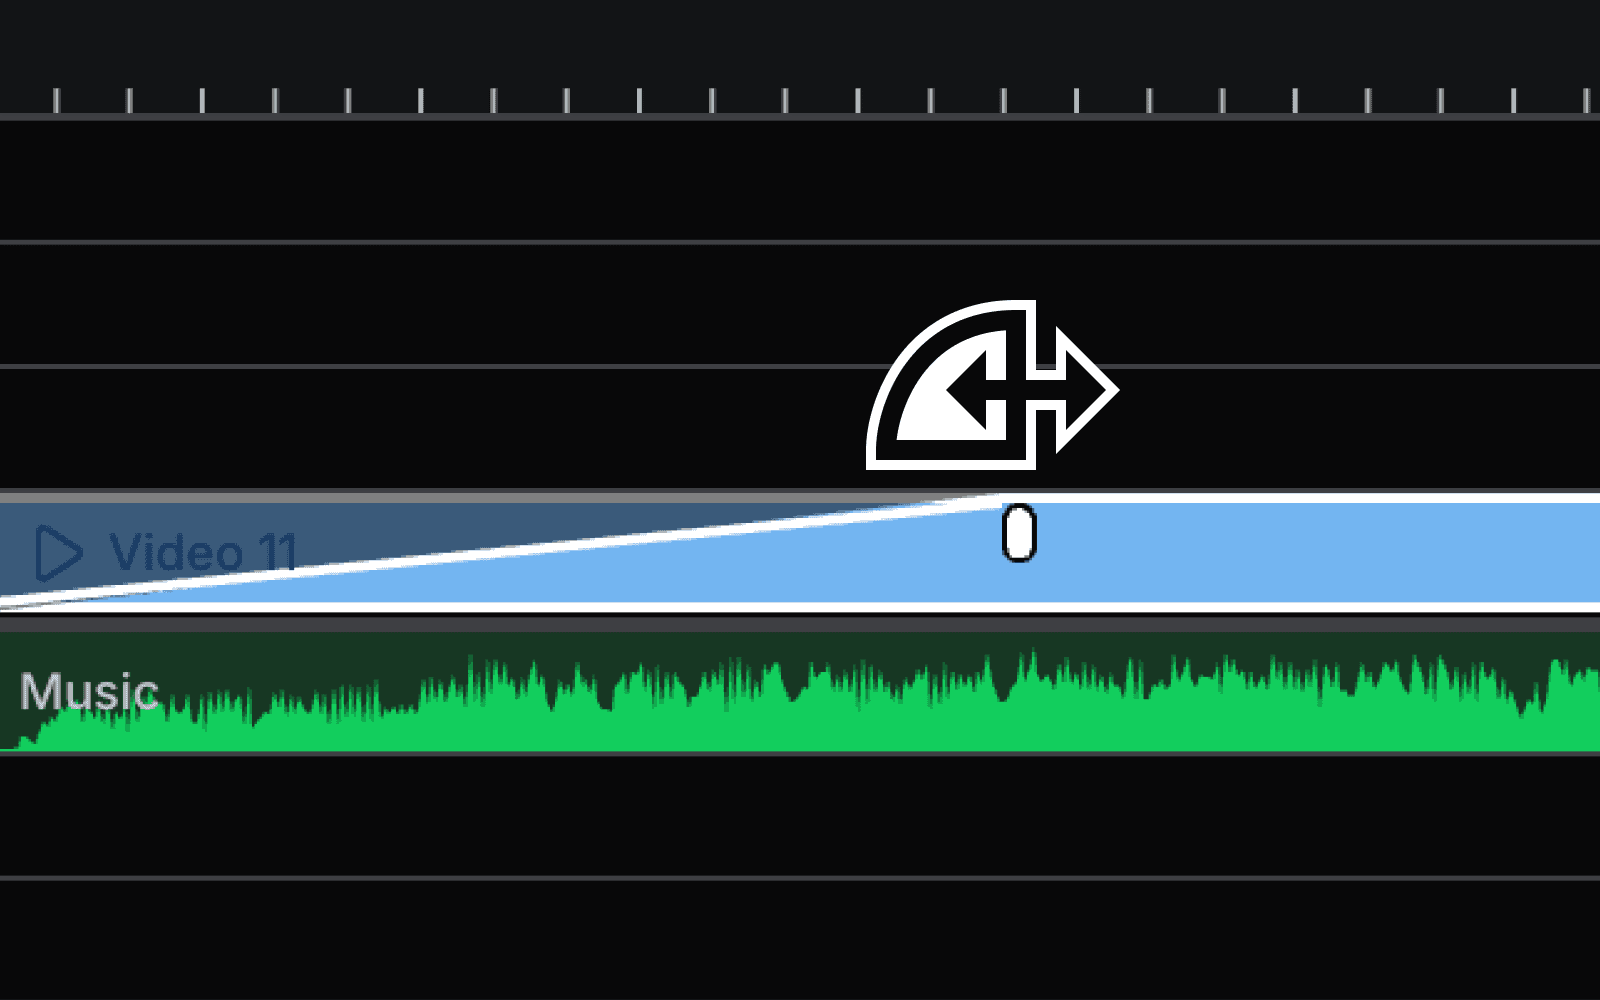
Clips have fade handles in their top corners. Easily click and drag the fade handles to create smooth fade-ins and fade-outs.
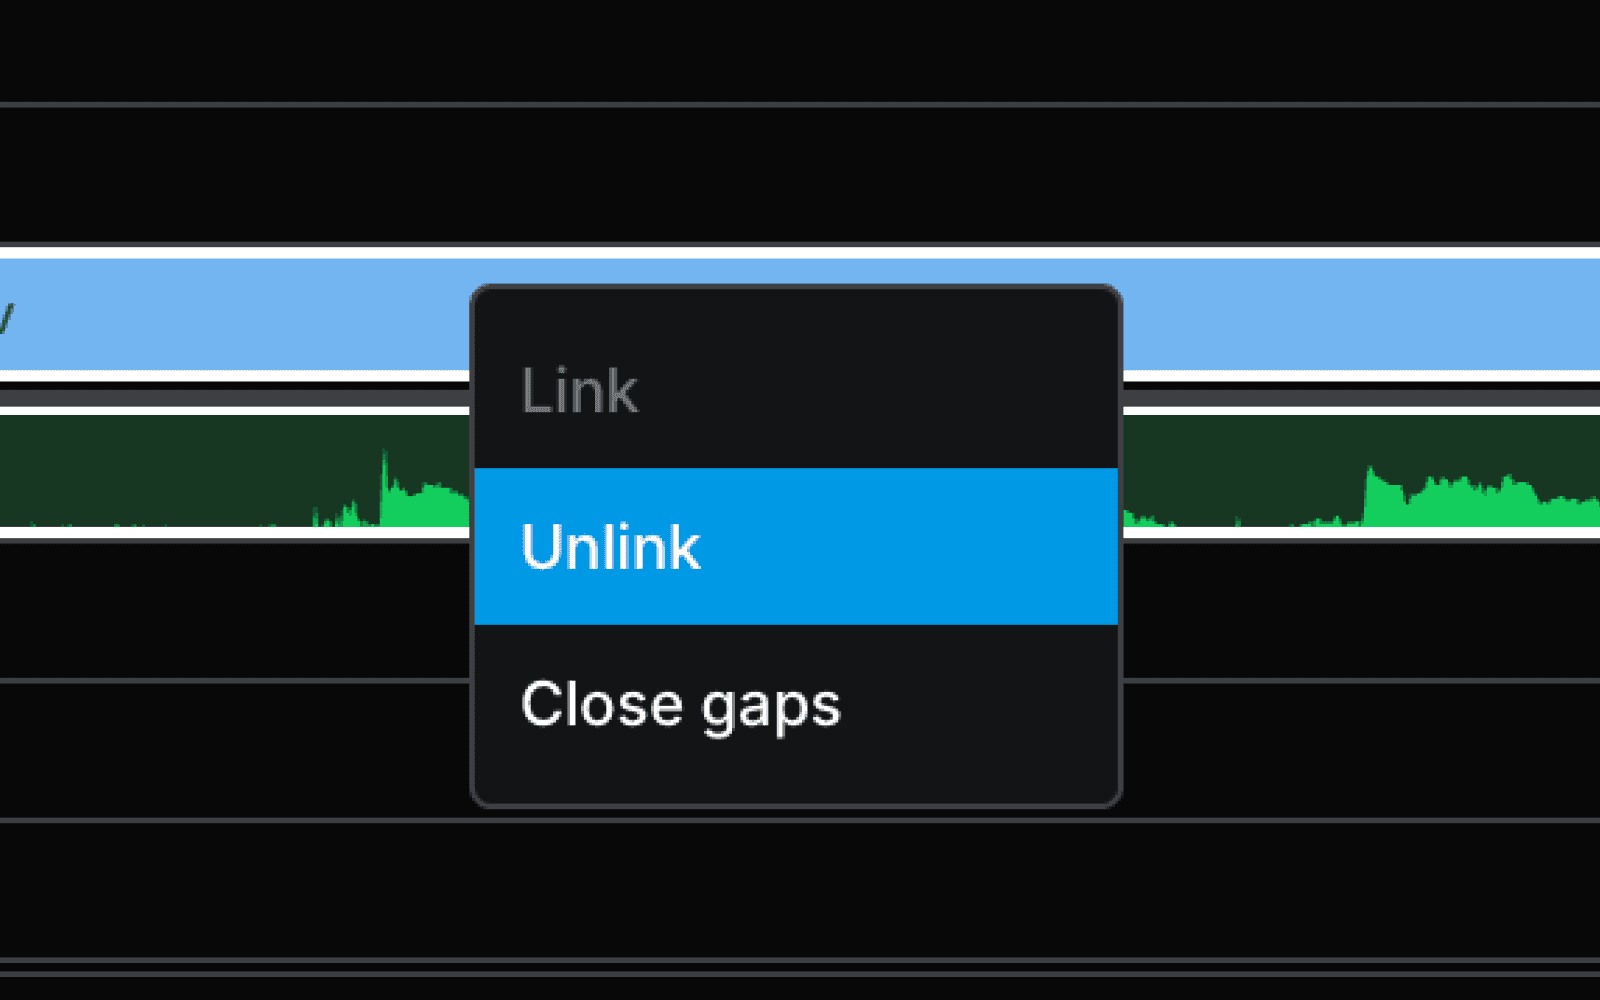
Separate audio from video
Right-click on a clip and select Unlink to separate the audio from the video. This is great when you want to delete a clip's audio or want to work on the audio and video independently.
Collaborate with others
Invite team members
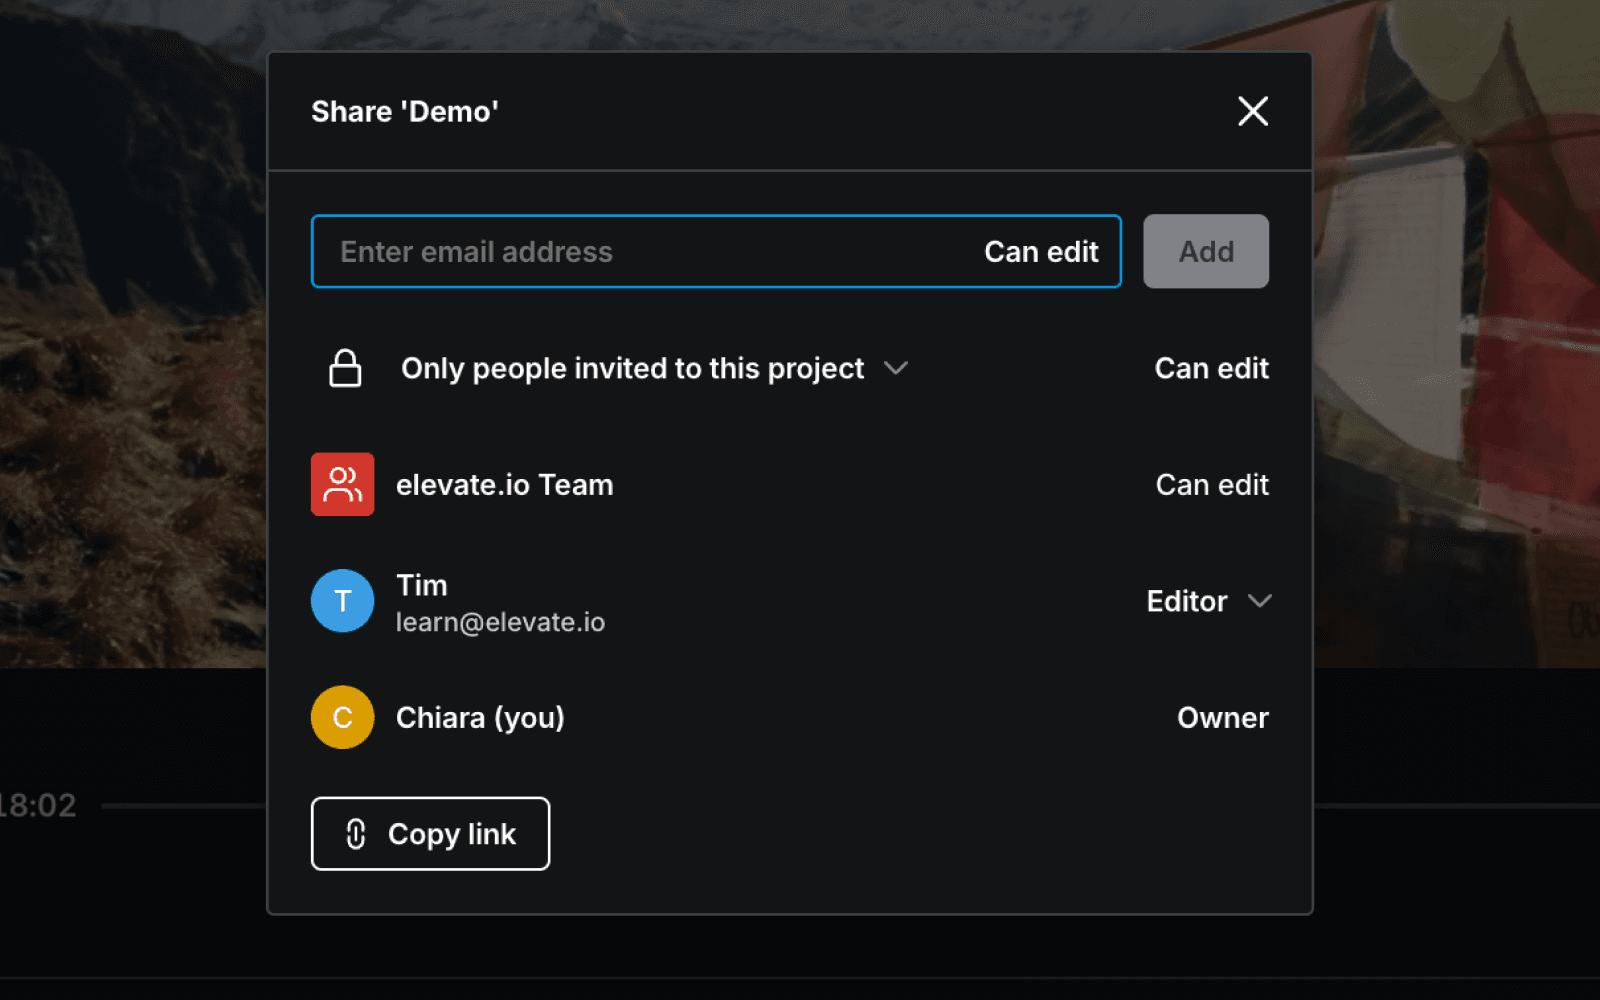
Click the blue
Invitebutton in the top-right corner of the editor.Enter your collaborator's email address to send an invitation.
Your collaborator will receive an email directing them to the project.
You can also hit
Copy linkand send a link to the project to them directly.
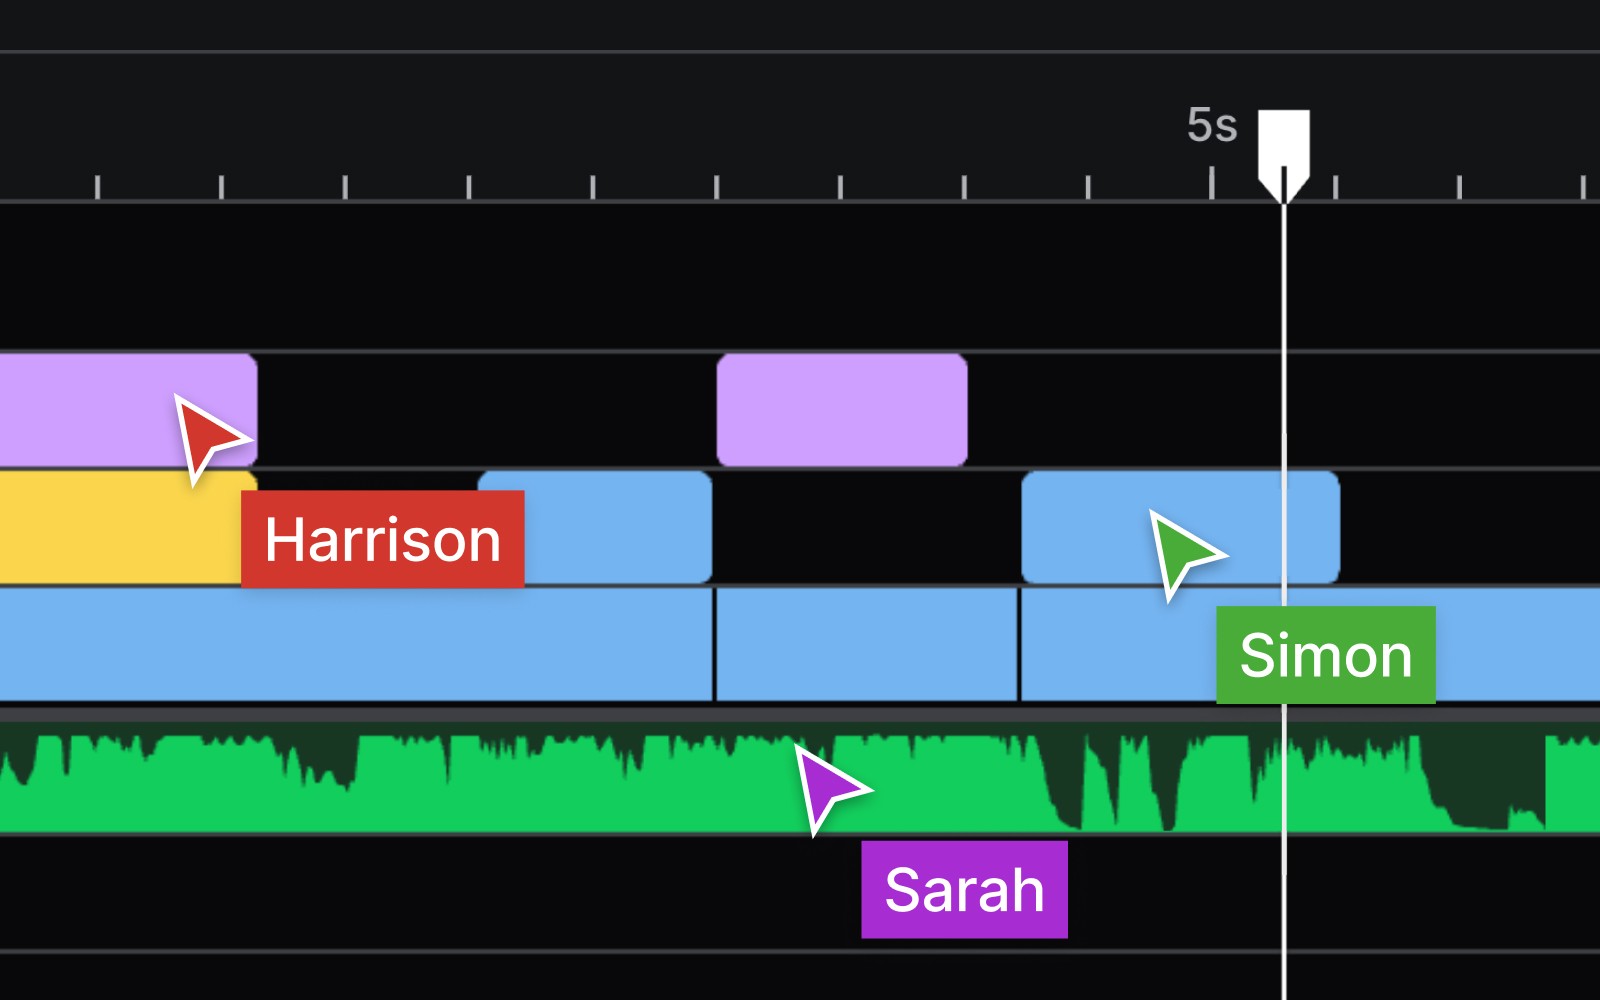
Real-time collaboration
Once invited, team members can join the project, comment, and edit in real-time. To follow your teammate, click on their icon in the top-right of the editor.
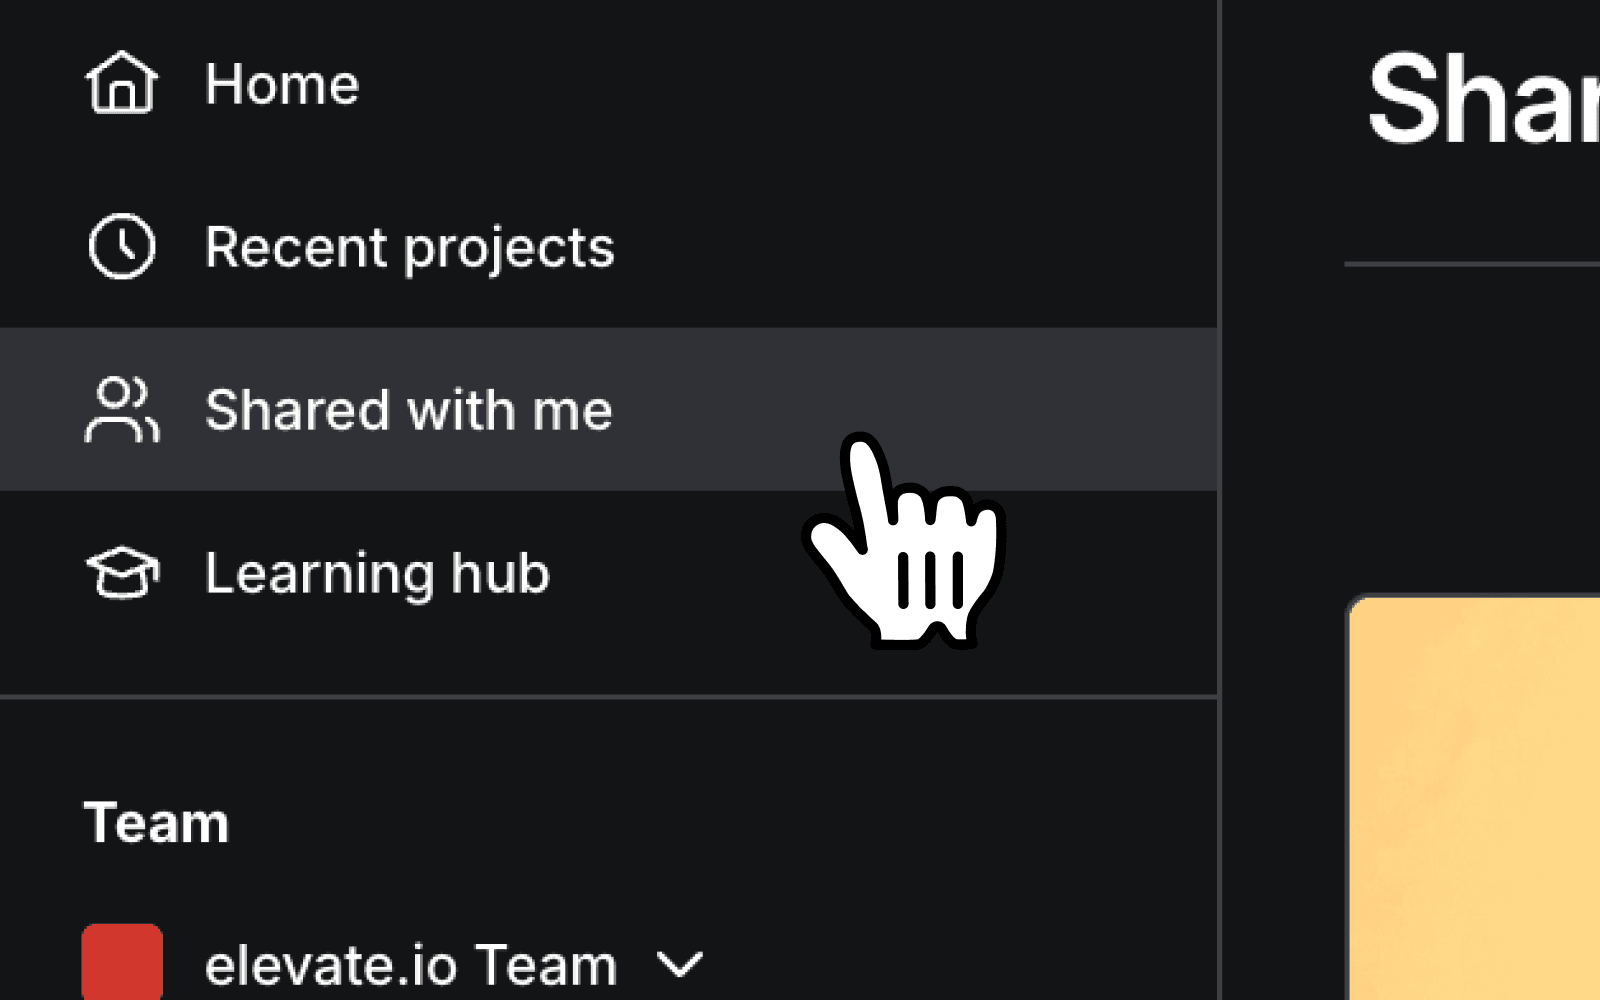
Shared video projects
To access projects you have been invited to, head to your elevate.io workspace and select 'Shared with me' in the panel on the left.
Elevate your video
Add music
Upload your chosen audio file to the Media panel.
Drag it onto the Timeline and place it where you want the music to start.
Use the fade handles to fade the beginning and end of the audio smoothly.
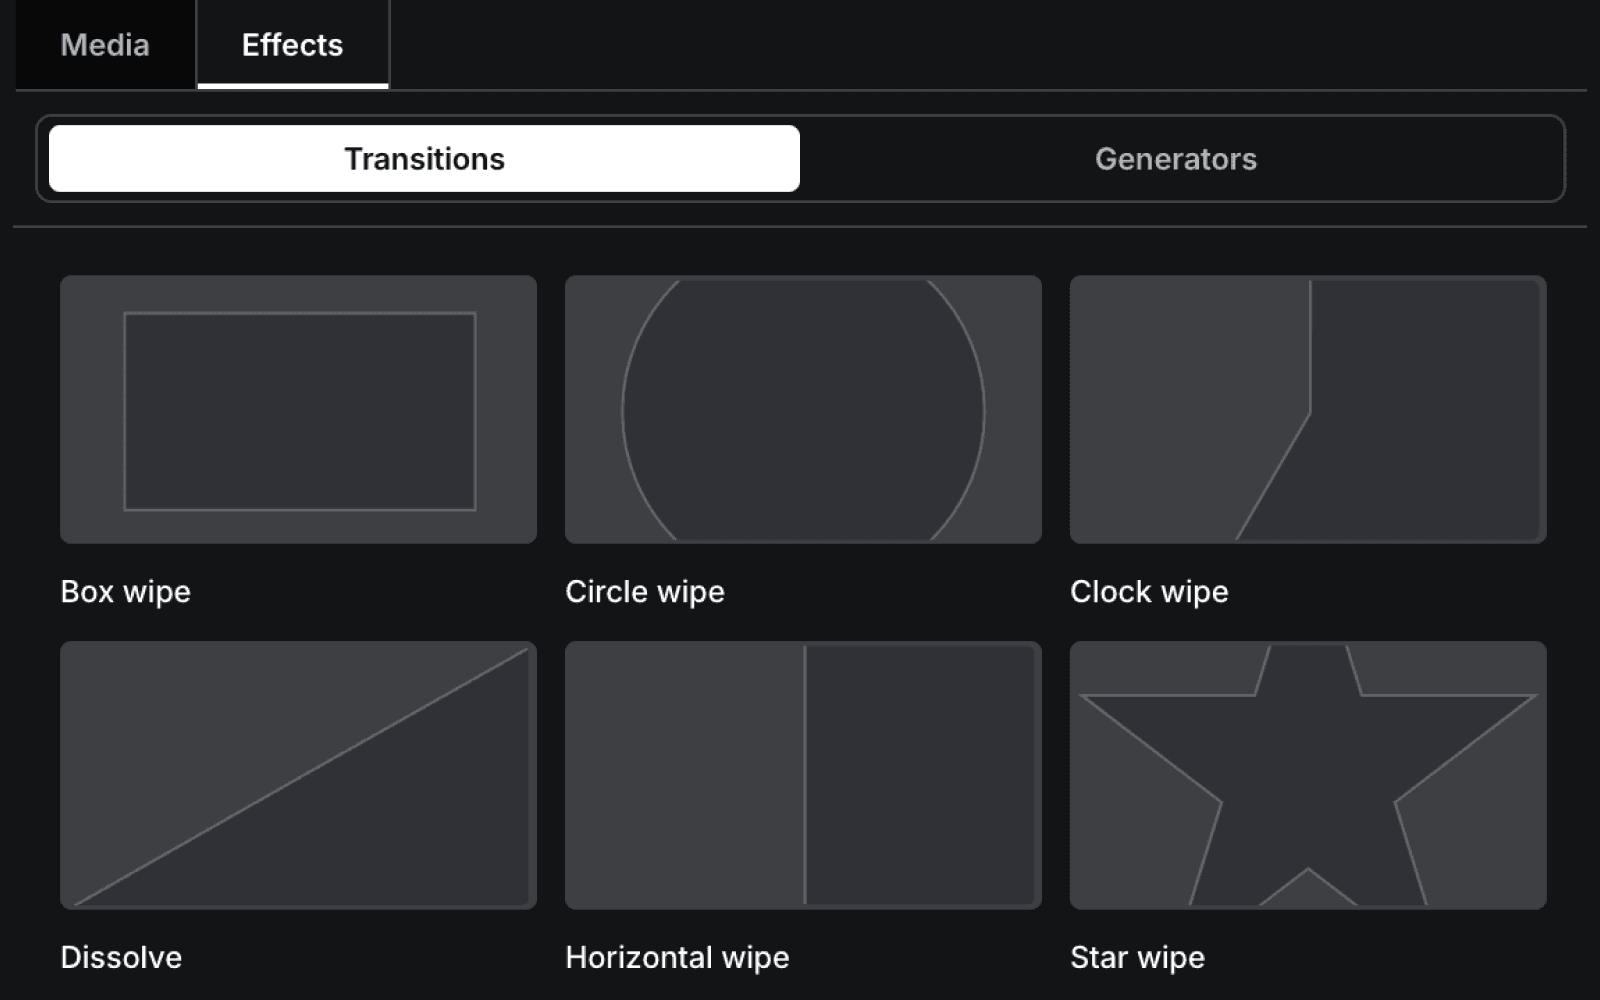
Apply transitions
Go to the Effects panel on the left side of the editor and select the Transitions tab.
Drag a transition where two clips connect on the Timeline.
To adjust the duration, drag the edges of the transition or select the transition on the timeline and adjust it by value in the Transition panel on the right.
Note: Make sure there is sufficient trimmed footage on the ends of where the clips connect for the Transition duration.
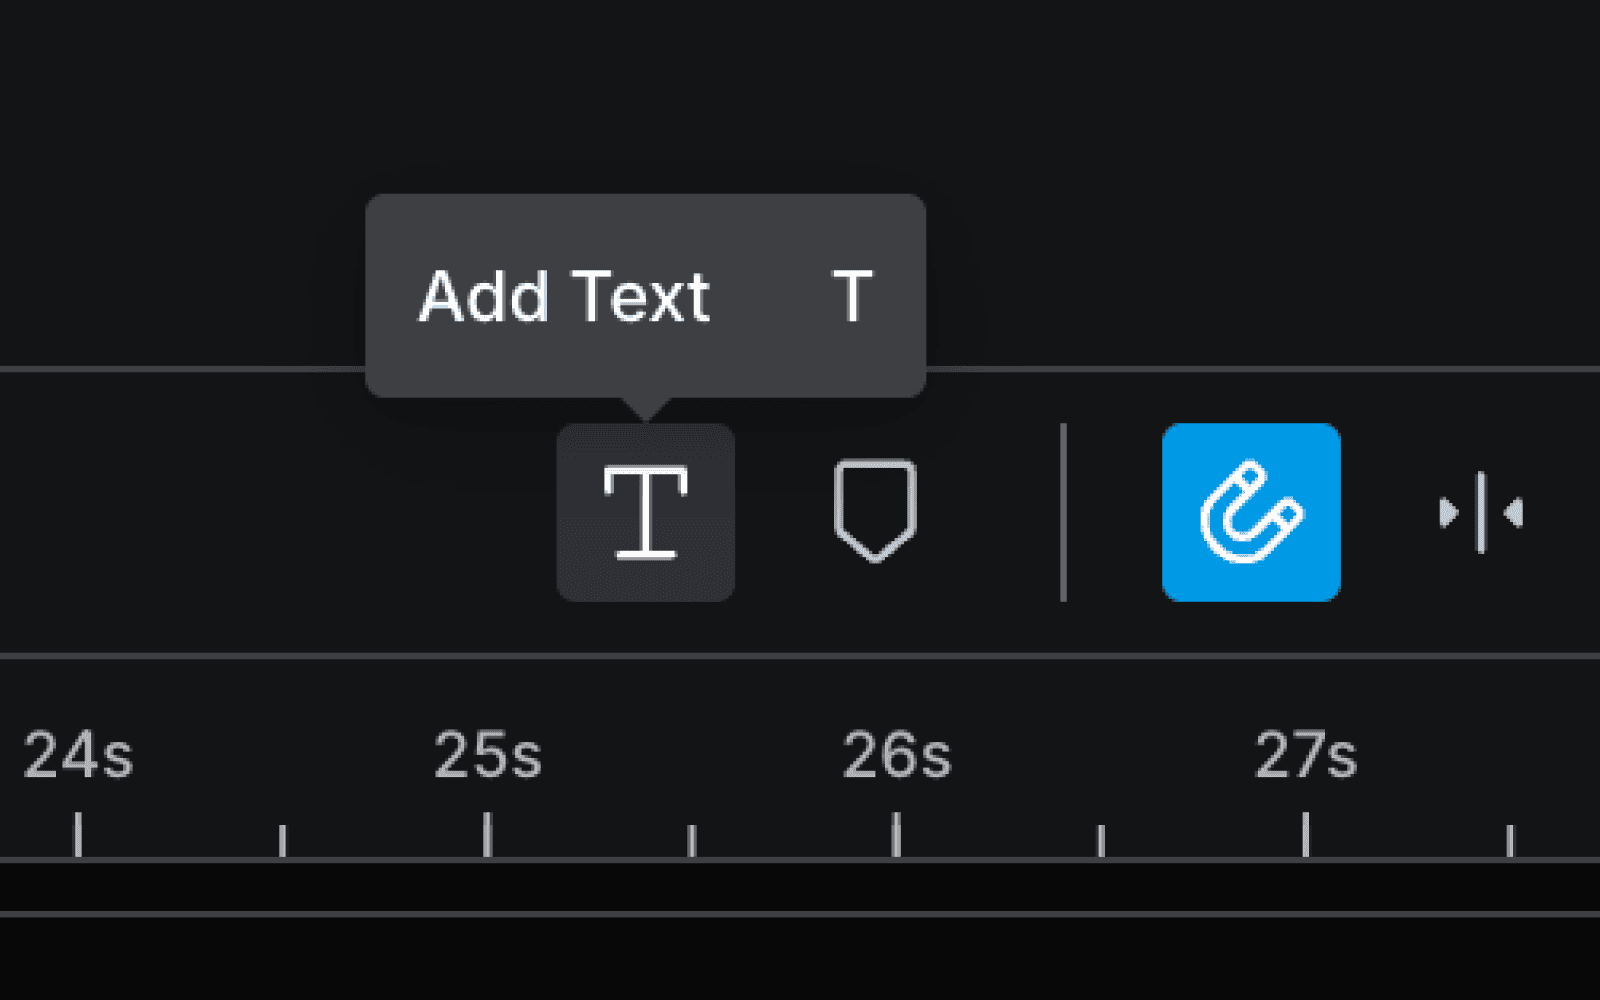
Add text
Select the 'T' icon above the timeline on the right to add text quickly.
Alternatively, go to the Generators tab in the Effects panel and drag a 'Basic text' block onto the Timeline.
Customize text in the Transform panel on the right. Type your message, change fonts, alignment, colors, size and more.
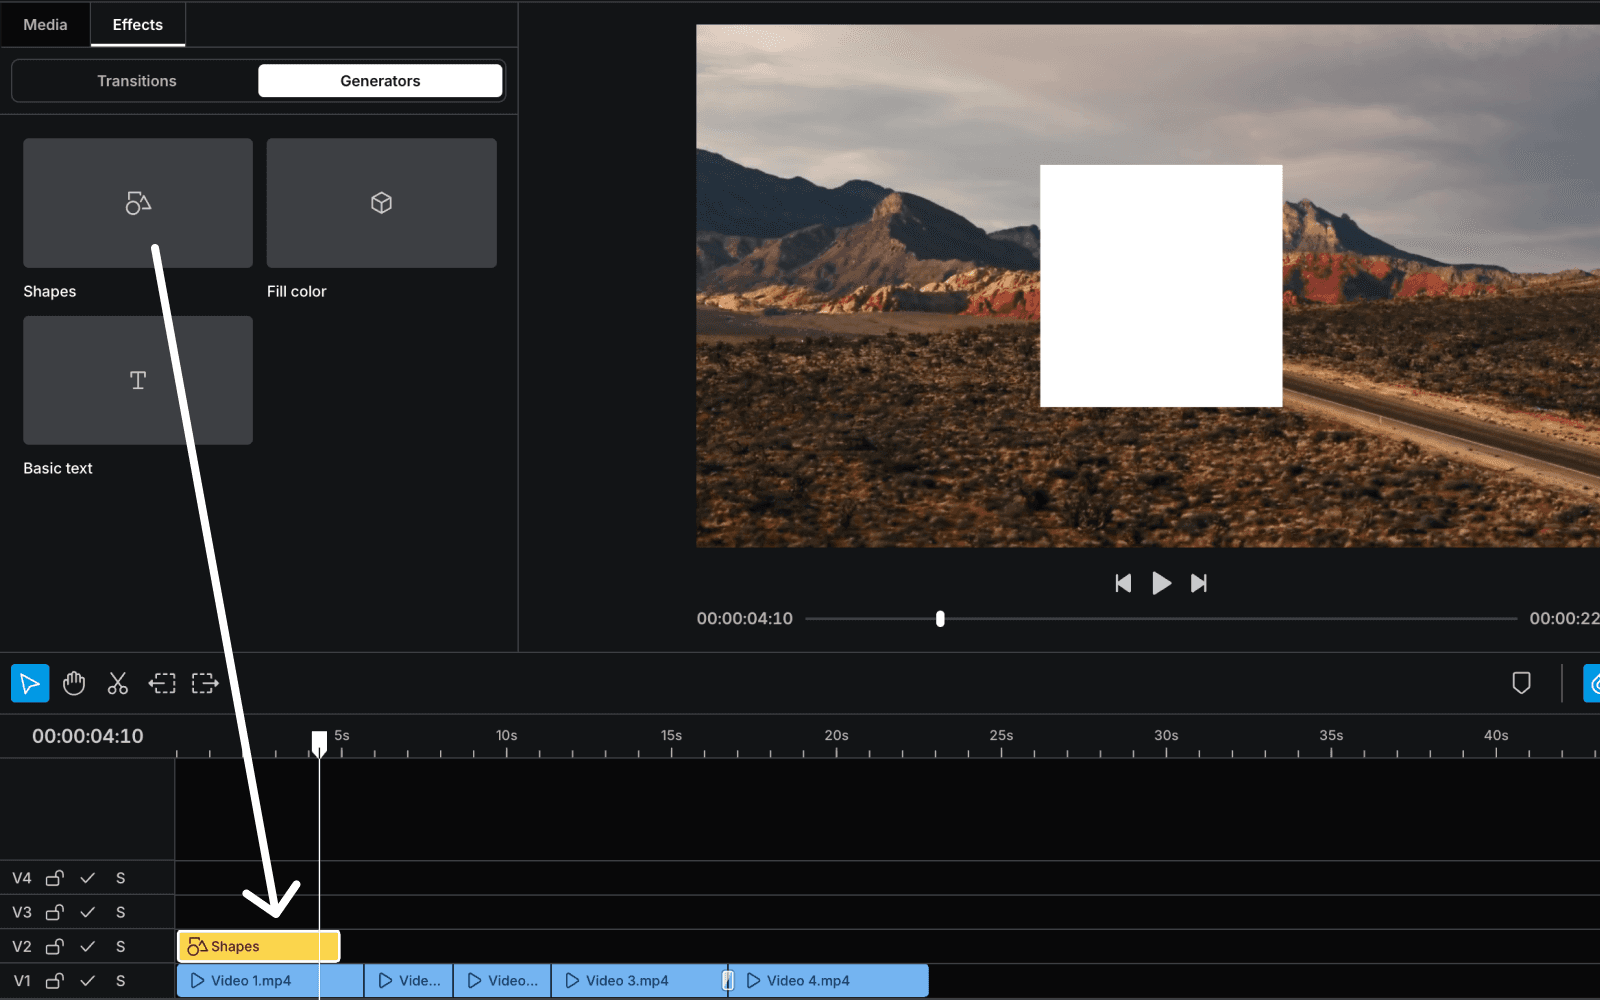
Add shapes
Go to the Effects tab, select Generators, and then drag a 'Shapes' block onto the timeline.
Customize its appearance in the Shapes controls on the right to complement your text or highlight elements.
Export your video
Finalizing your video project
Click
Exportin the top right of the editor.Choose your desired export quality.
Click
Export Videoto begin rendering.

Complete export
Exporting will happen in the cloud, meaning your free to use your computer however you please. Once the export is finished, an email notification will be sent to your inbox with a download link.
Project complete
You've successfully completed your first video project with elevate.io. Explore more video editing guides in our Learn Hub to improve your editing skills and discover new features.