
How to change the color of a video
Easily get a professional color grade on your video using elevate.io's built-in color tools, including basic adjustment, color wheels, and Input LUTs.
Where to find the color controls
Open a project and select a clip on your timeline.
Head to the right side panel and make sure you've clicked the 'Video' tab.
Then, scroll down until you reach the 'Color' section.
Color space: Log format & Input LUTs
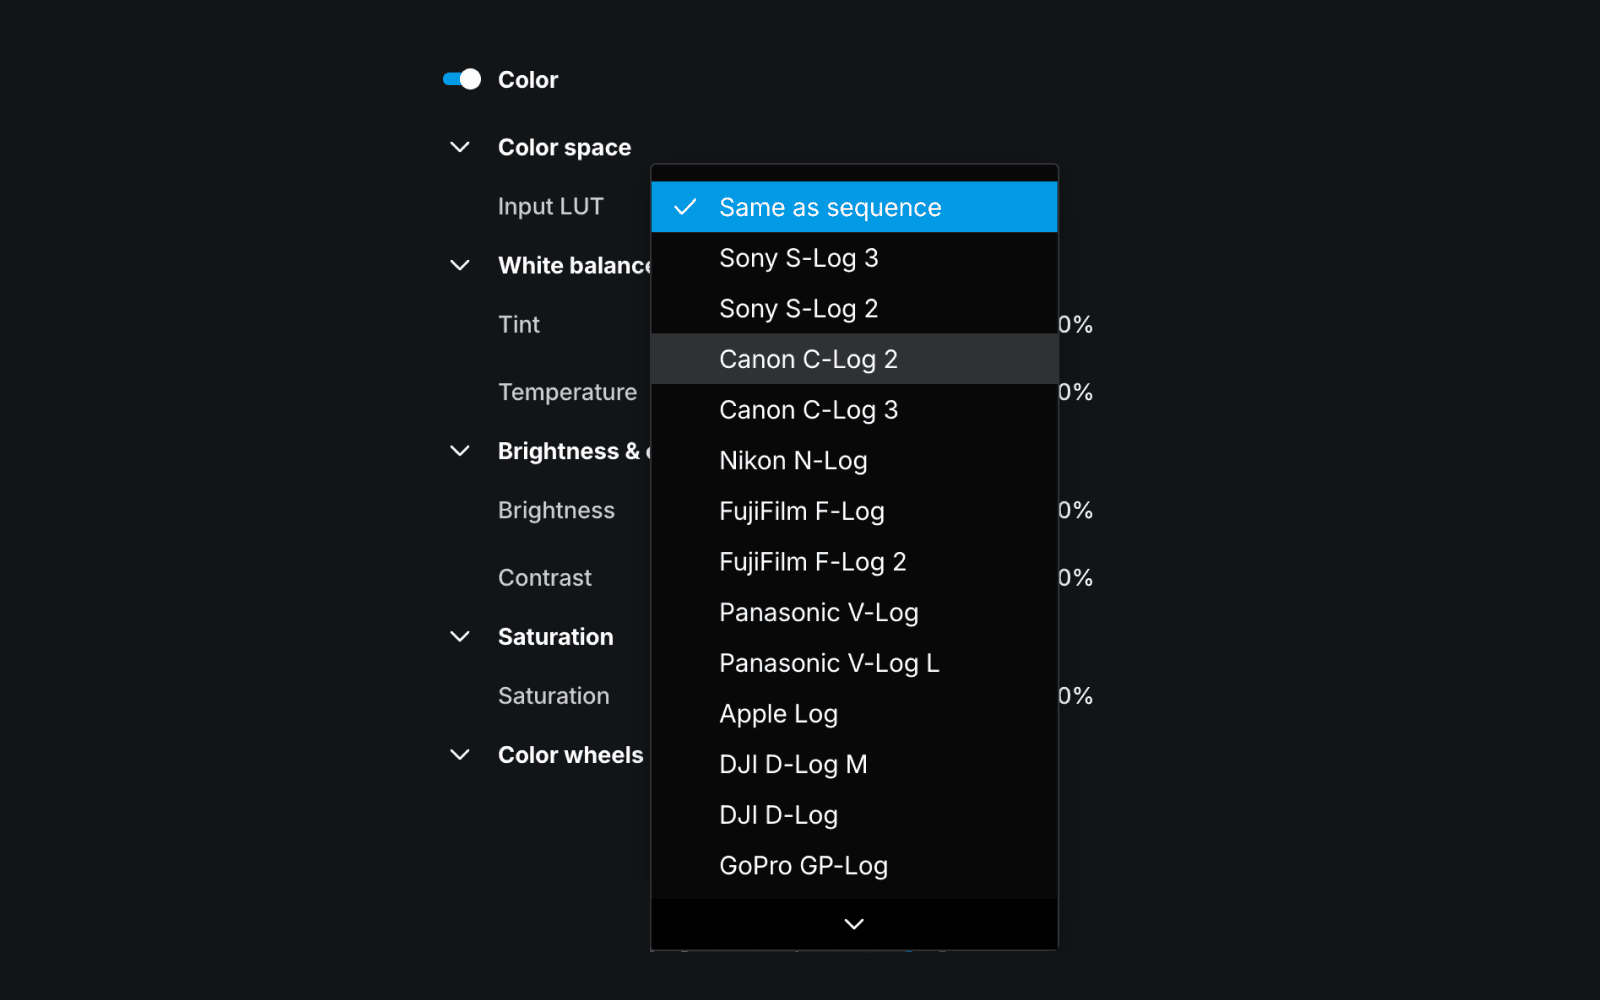
If you're on a Premium plan, the top of the Color section shows a 'Color space' dropdown. This is where you'll find Input LUTs for Log footage.
What is Log footage?
Log is a recording format built into many cameras. When you upload Log footage into the editor, it will look dull and washed out, but that's intentional. The camera is holding back the picture so it can retain as much detail as possible in the bright and dark areas. That way, you end up with more to work with when you start color grading.
What is an Input LUT?
An Input LUT (Look-Up Table) is a color profile that converts your flat Log footage into a usable baseline, giving you a natural starting point before you begin to color grade.
Applying an Input LUT
Click the dropdown and match it to your camera:
Sony cameras = Sony S-Log options
Canon cameras = Canon Log
etc.
Your footage should look balanced and natural straight away. From there, you're ready to color grade.
Basic color adjustments
Your basic color adjustments include tint and temperature, brightness and contrast, and saturation levels. Remember, for more slider control, hold shift.
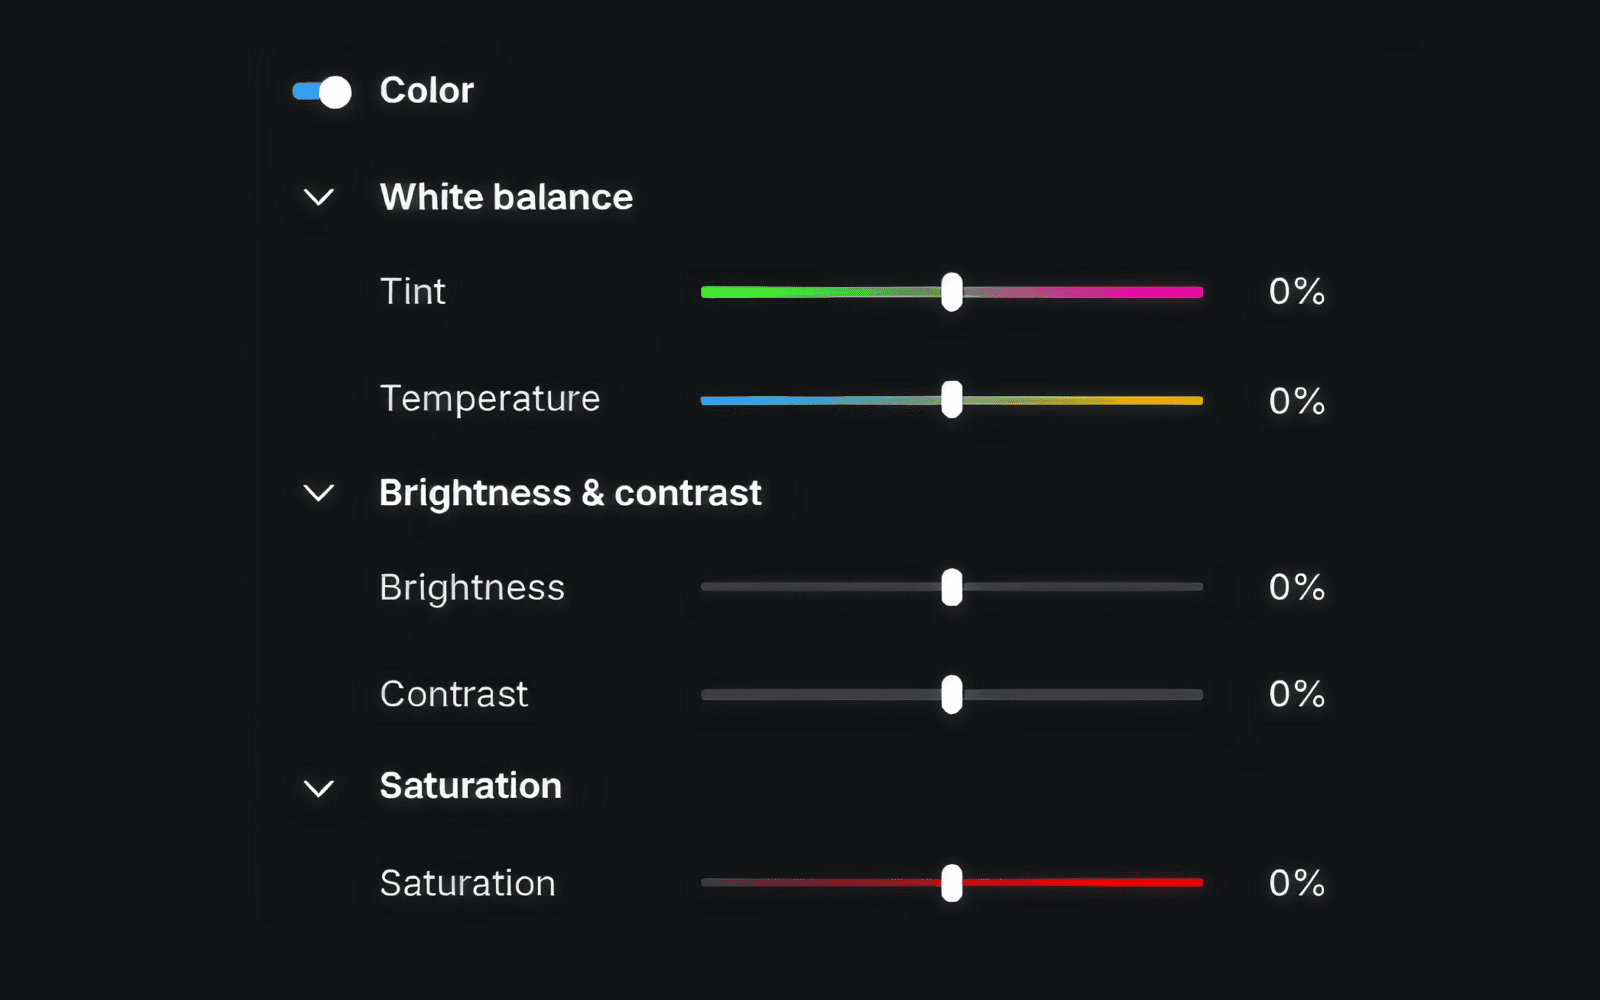
These sliders affect the whole image, so it's good to get the overall balance right before moving on to the color wheels.
Color grade with Color wheels
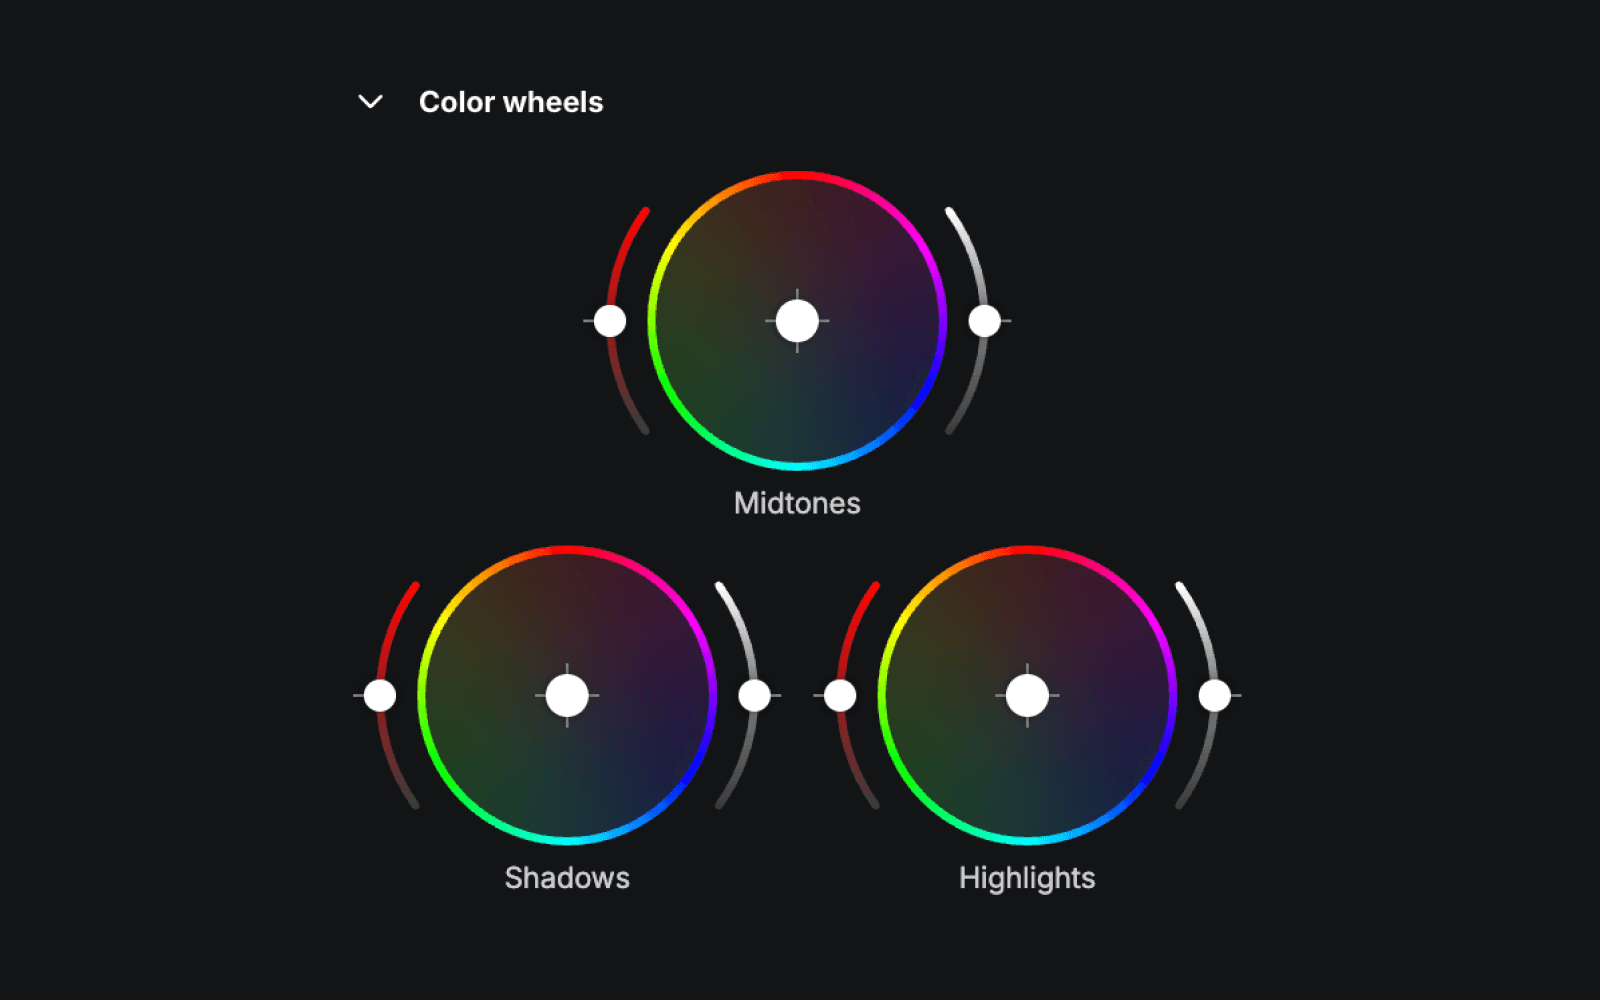
The Color wheels sit below the basic color adjustment sliders. They allow you to independently adjust the shadows, midtones, and highlights of your footage.
How they work
Drag the point inside the wheel away from the centre to push color in that direction. The further from the centre, the stronger the shift.
The left slider controls saturation for that range.
The right slider controls how light or dark that range is.
Shadows
Shadows are the darkest parts of your image. For example, unlit backgrounds, shaded faces, anything underexposed.
Midtones
Midtones cover everything in the middle — not fully dark or fully bright. It's where the majority of video detail lives and typically has the biggest impact on the overall feel of your footage. A small nudge goes a long way!
Highlights
Highlights are the brightest parts of your video, like open sky, windows, direct light sources. Pushing the highlights wheel towards warm tones like yellow and orange is a quick way to get a warm, golden hour look even if you shot in flat light at midday.